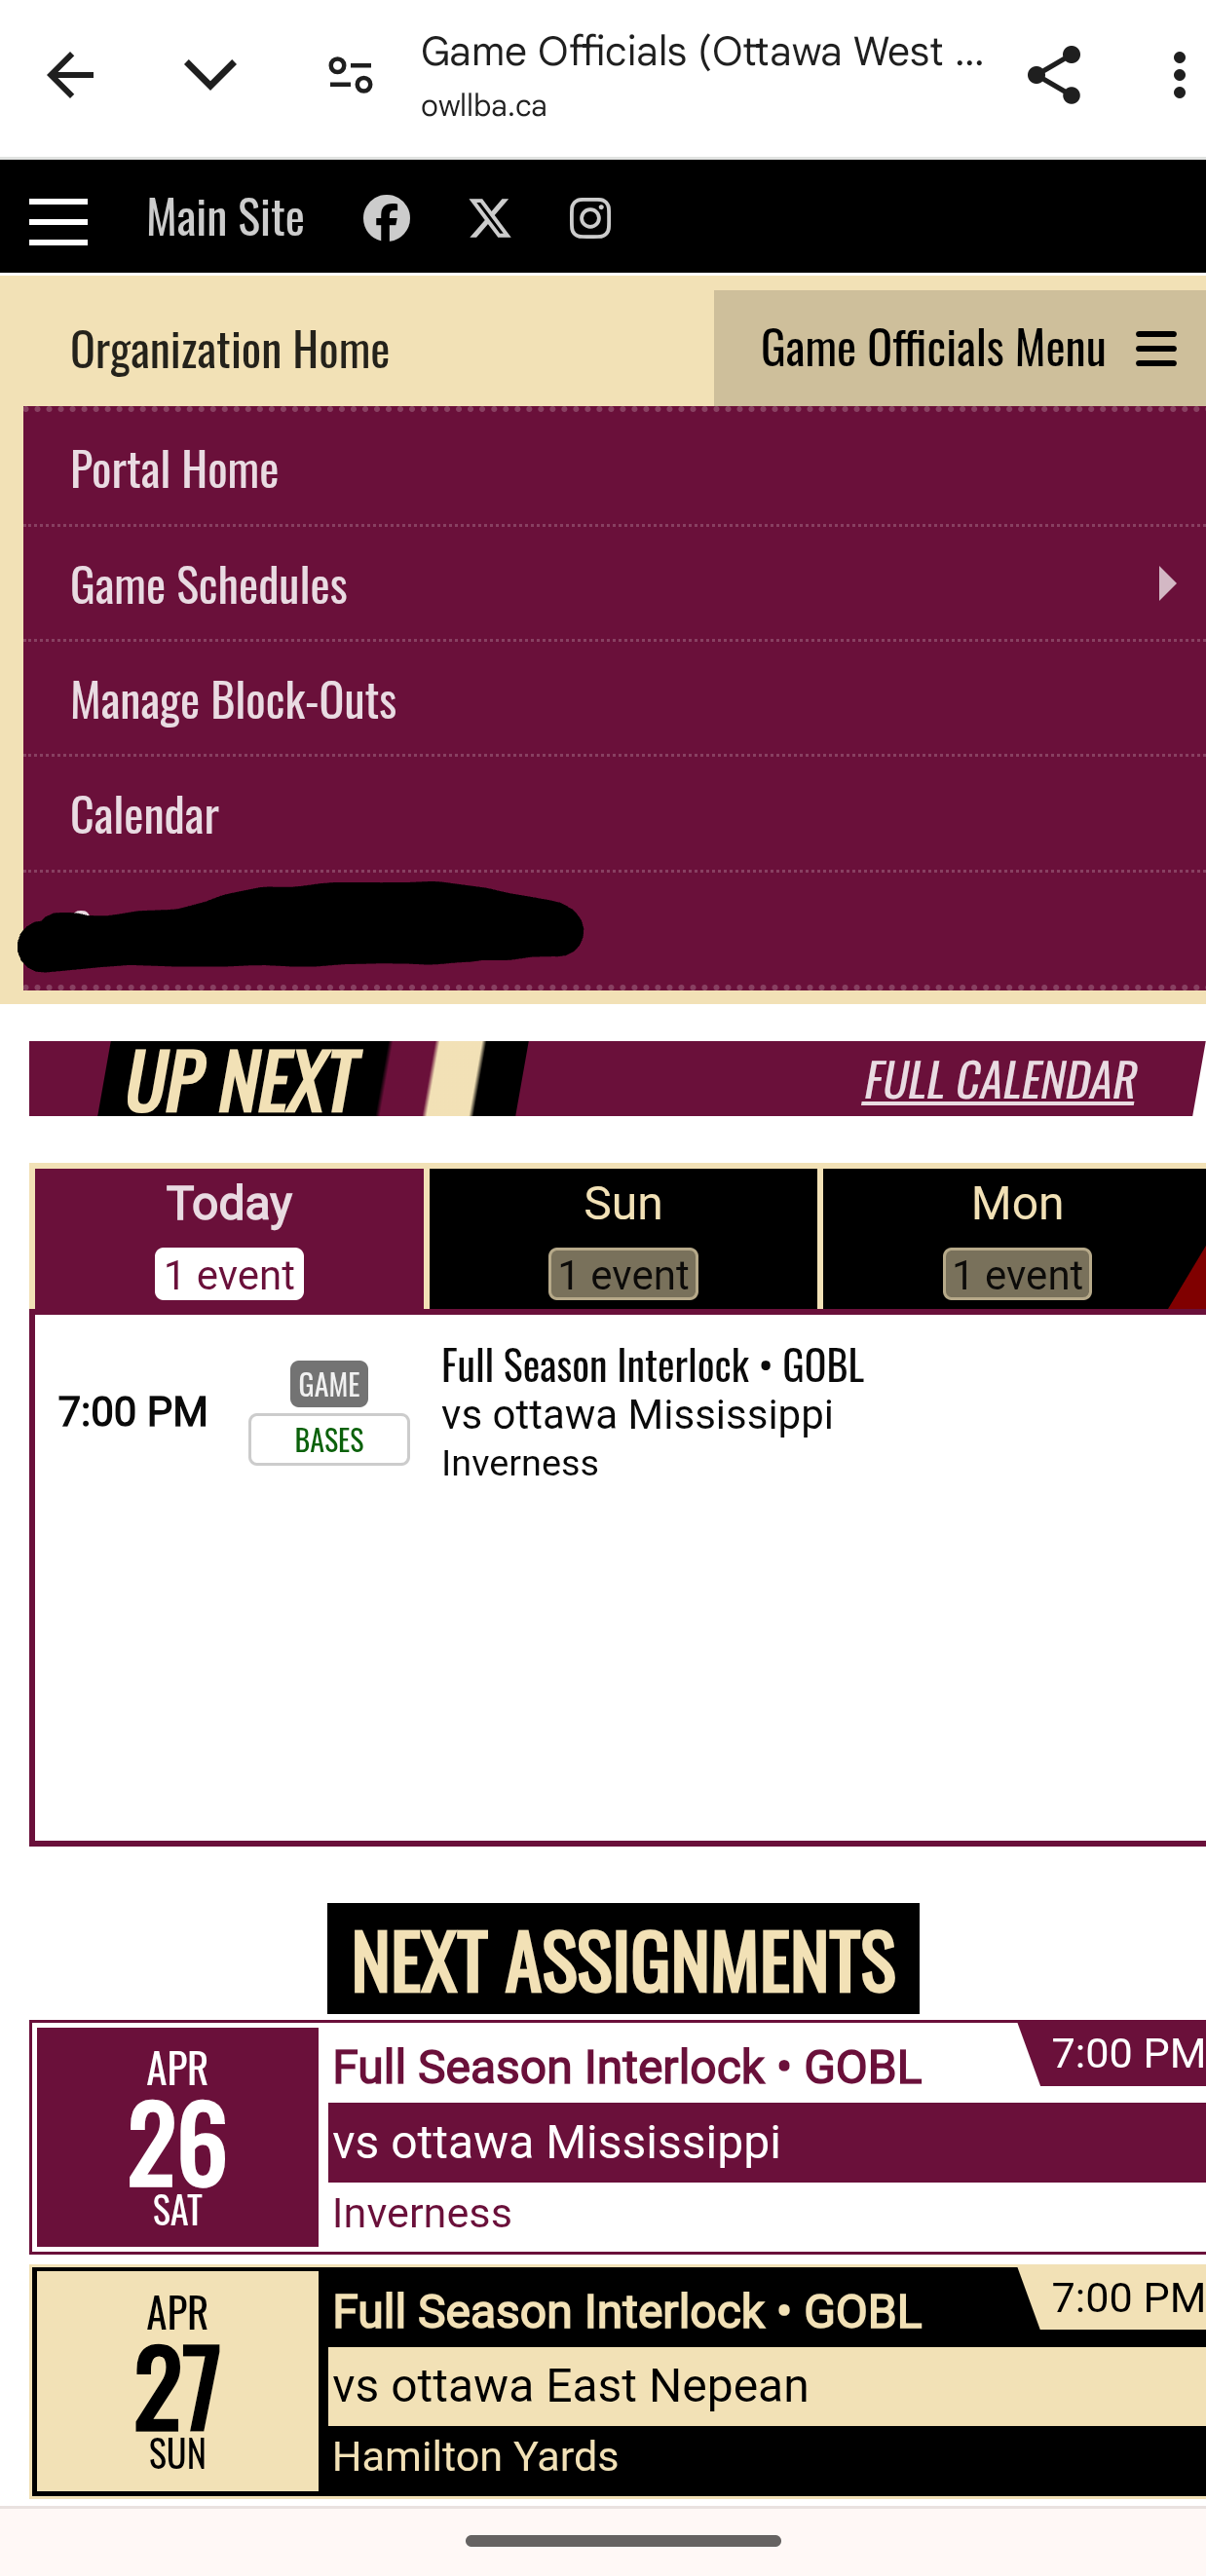
In the upper left corner, click on the "game officials menu" which will allow you to navigate to schedules, your block out (or availability) dates, and your calendar.
Using the
login ID and password that you were emailed shortly after you registered to umpire with OWLL, login to the officials portal (see above for help).
If you have forgotten your login ID, please contact our umpire scheduler. If you have forgotten your password, click on the Password reset option. The officials portal is accessible via desktop or mobile device (all screenshots in these guides are from mobile use, your screen may appear slightly different if using desktop).
Once logged in, click on "game officials menu" in the upper right hand corner of your screen (on mobile).On desktop, the game officials menu options are listed at the top of the screen already.
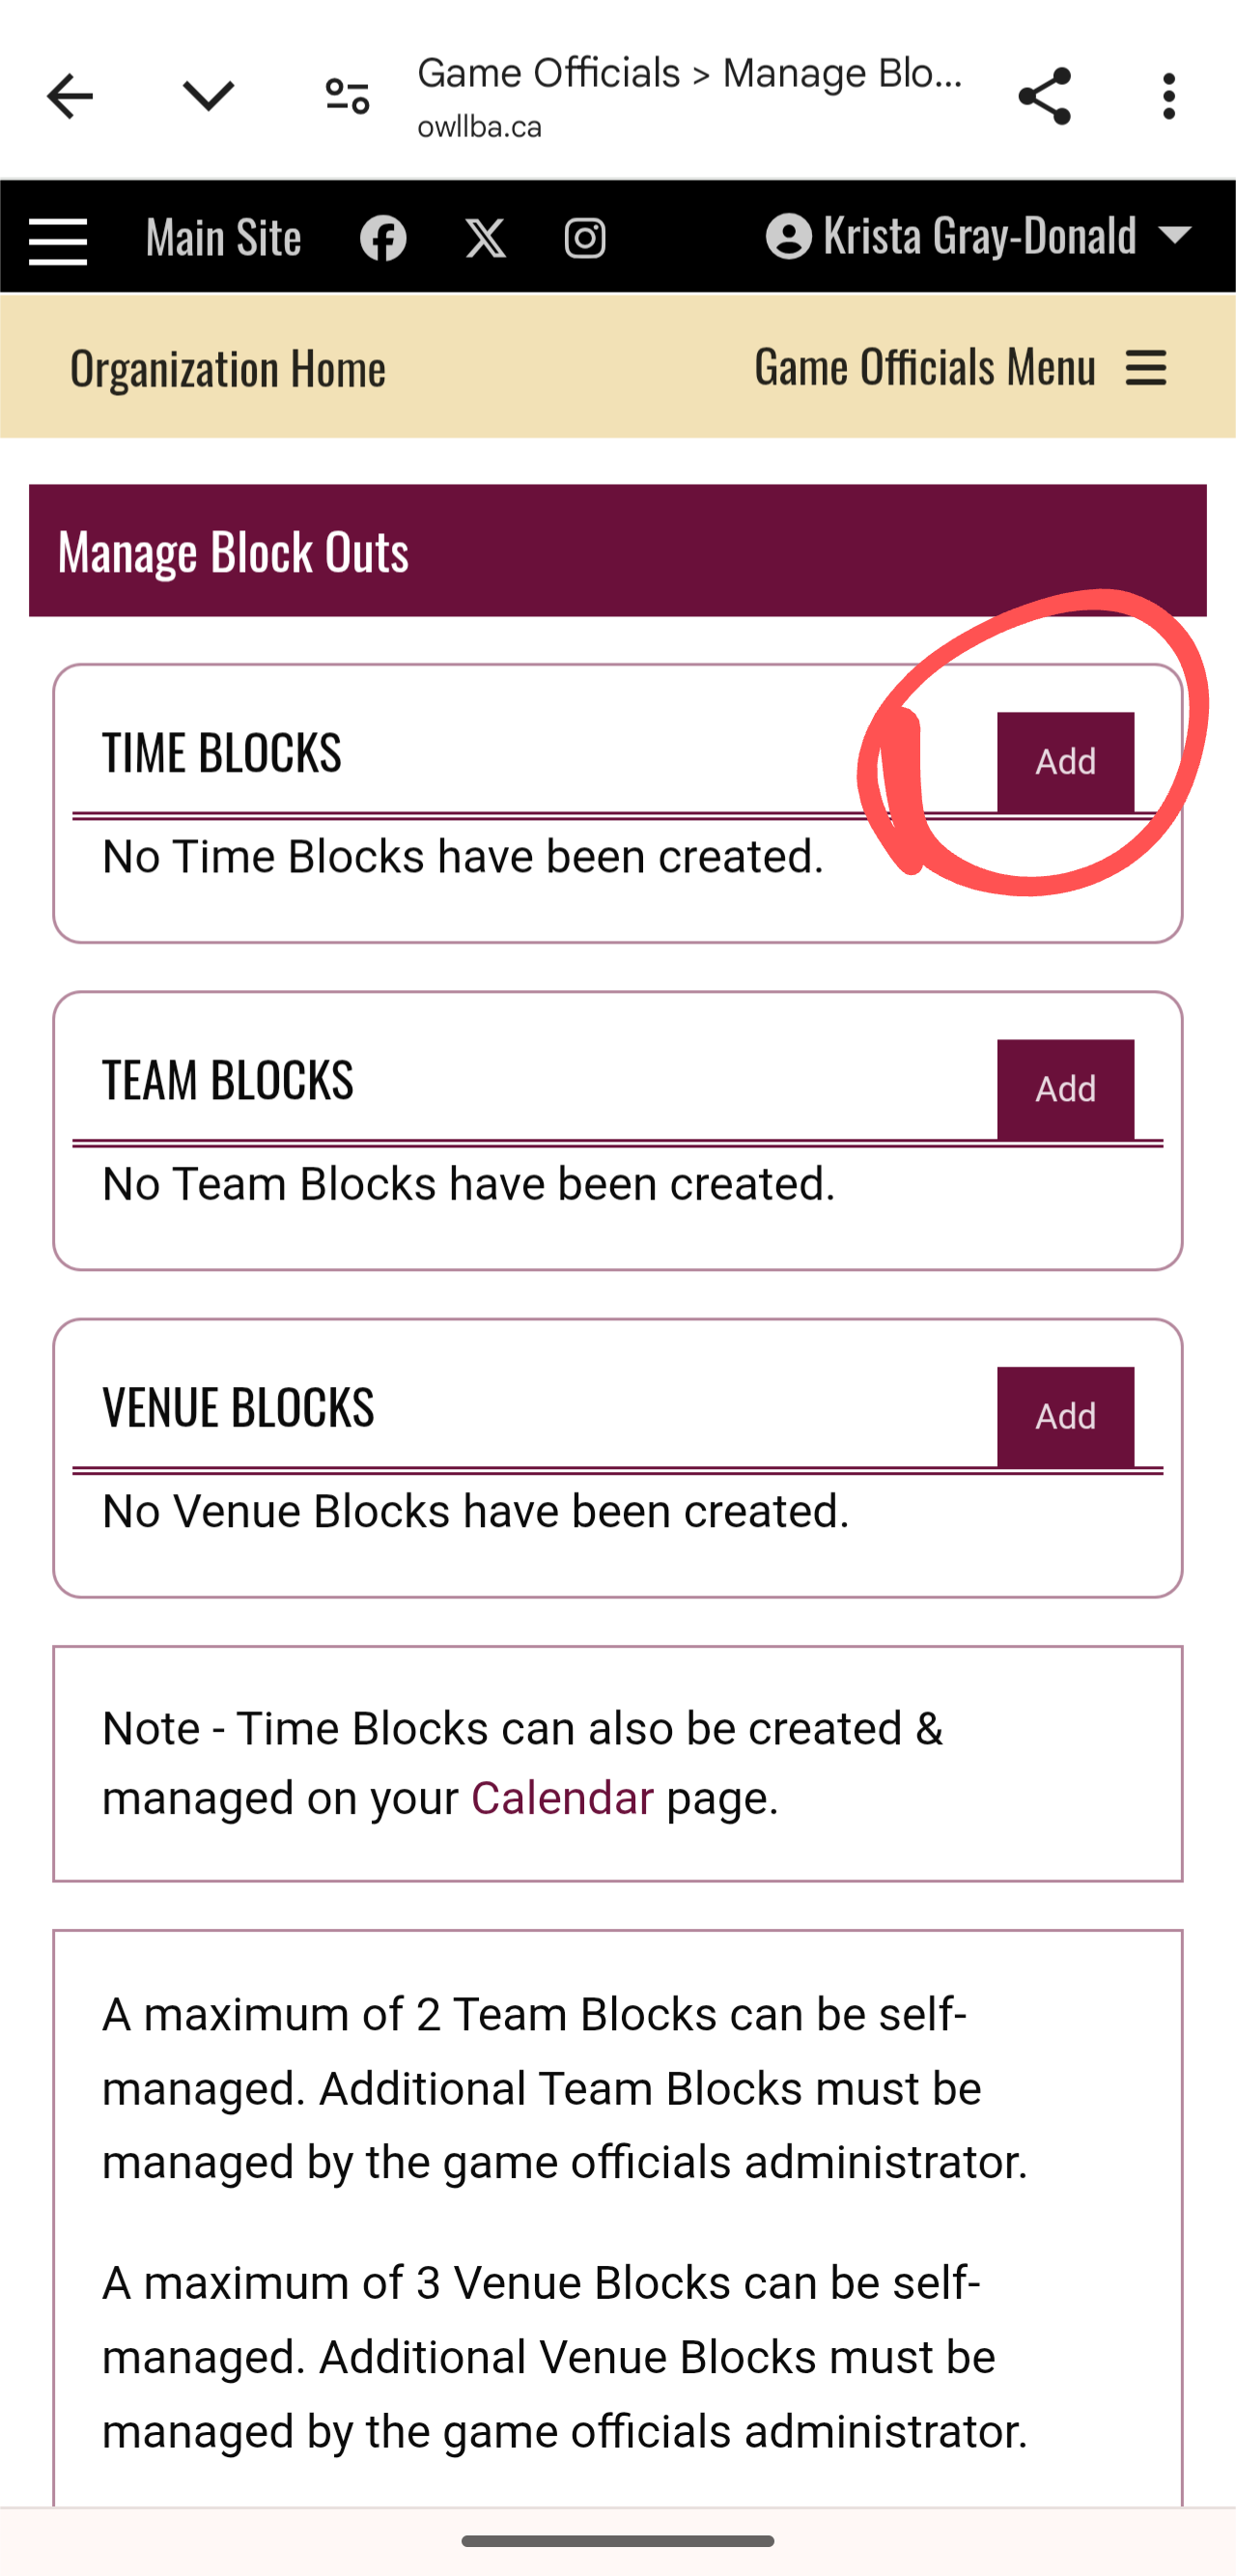
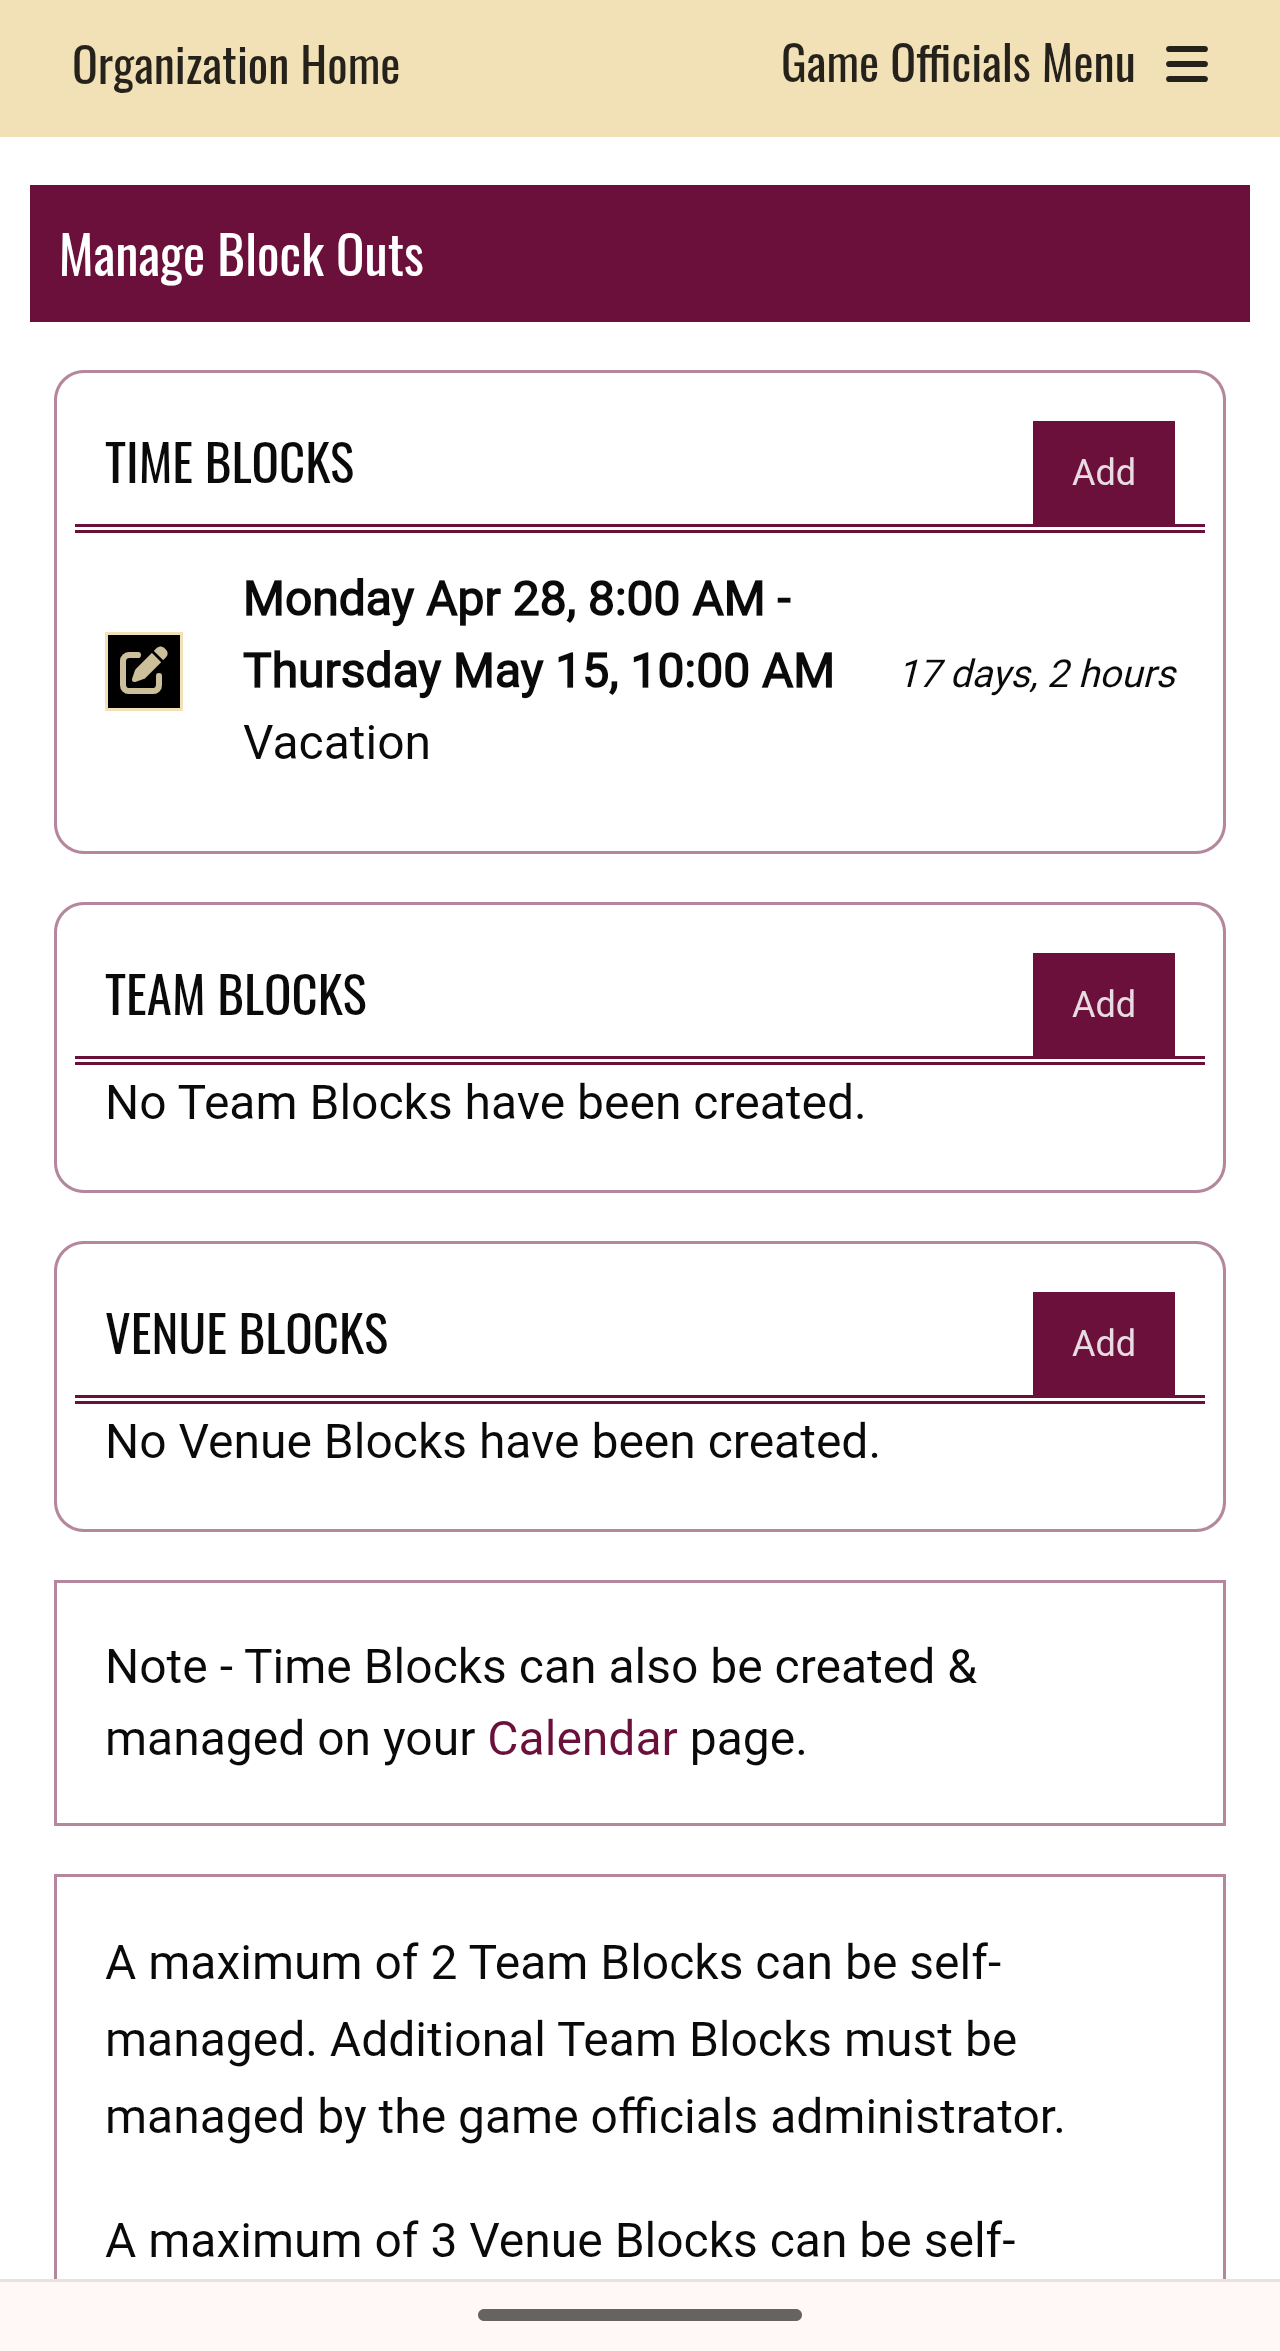
Click "manage block-outs" to starting setting up your availability. The default setting for your availability is "available" so you need to enter the dates/times that you are NOT AVAILABLE here.

There are two ways that you can block out the times that you are not available - both will be described below and are accessible from the screen that opens after you click
manage block-outs.
Option one, useful for blocking off longer date ranges, can be accessed by clicking the "add" button in the time blocks section.
Once clicked, a screen will open that allows you to fill in the date/time range that you will not be available. Once you have added the details, click save at the bottom.
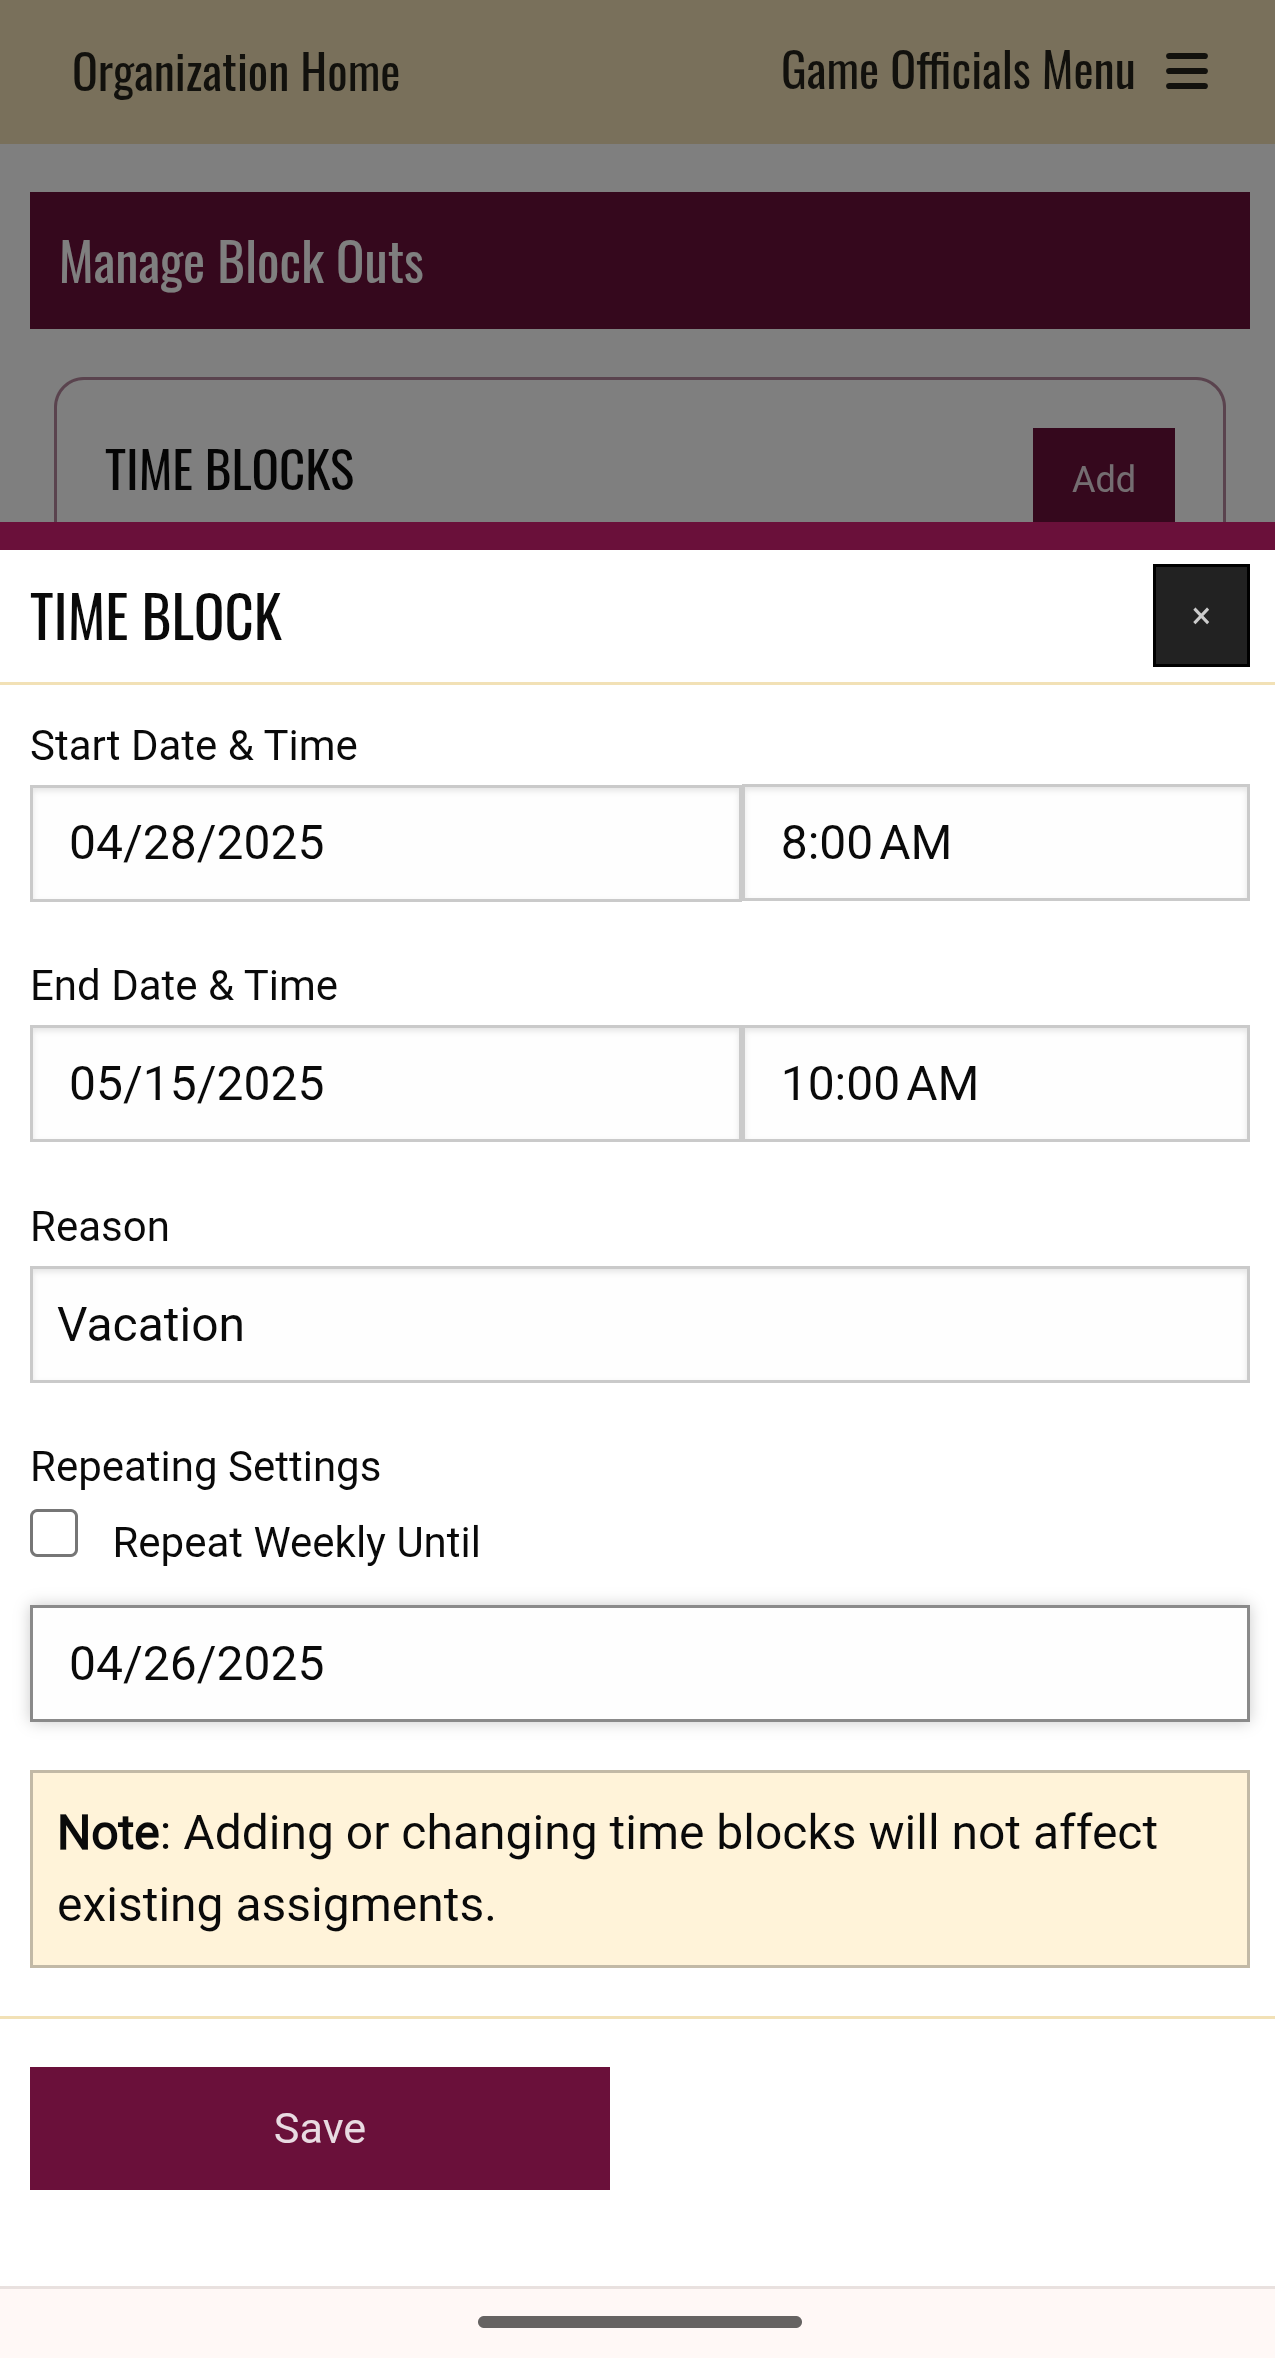
After you click save, your time block will be visible in the summary page.
 Option two, useful for blocking off several individual dates (ie your baseball games and practices), can be accessed by clicking the calendar link in the "notes" of the manage time blocks page.
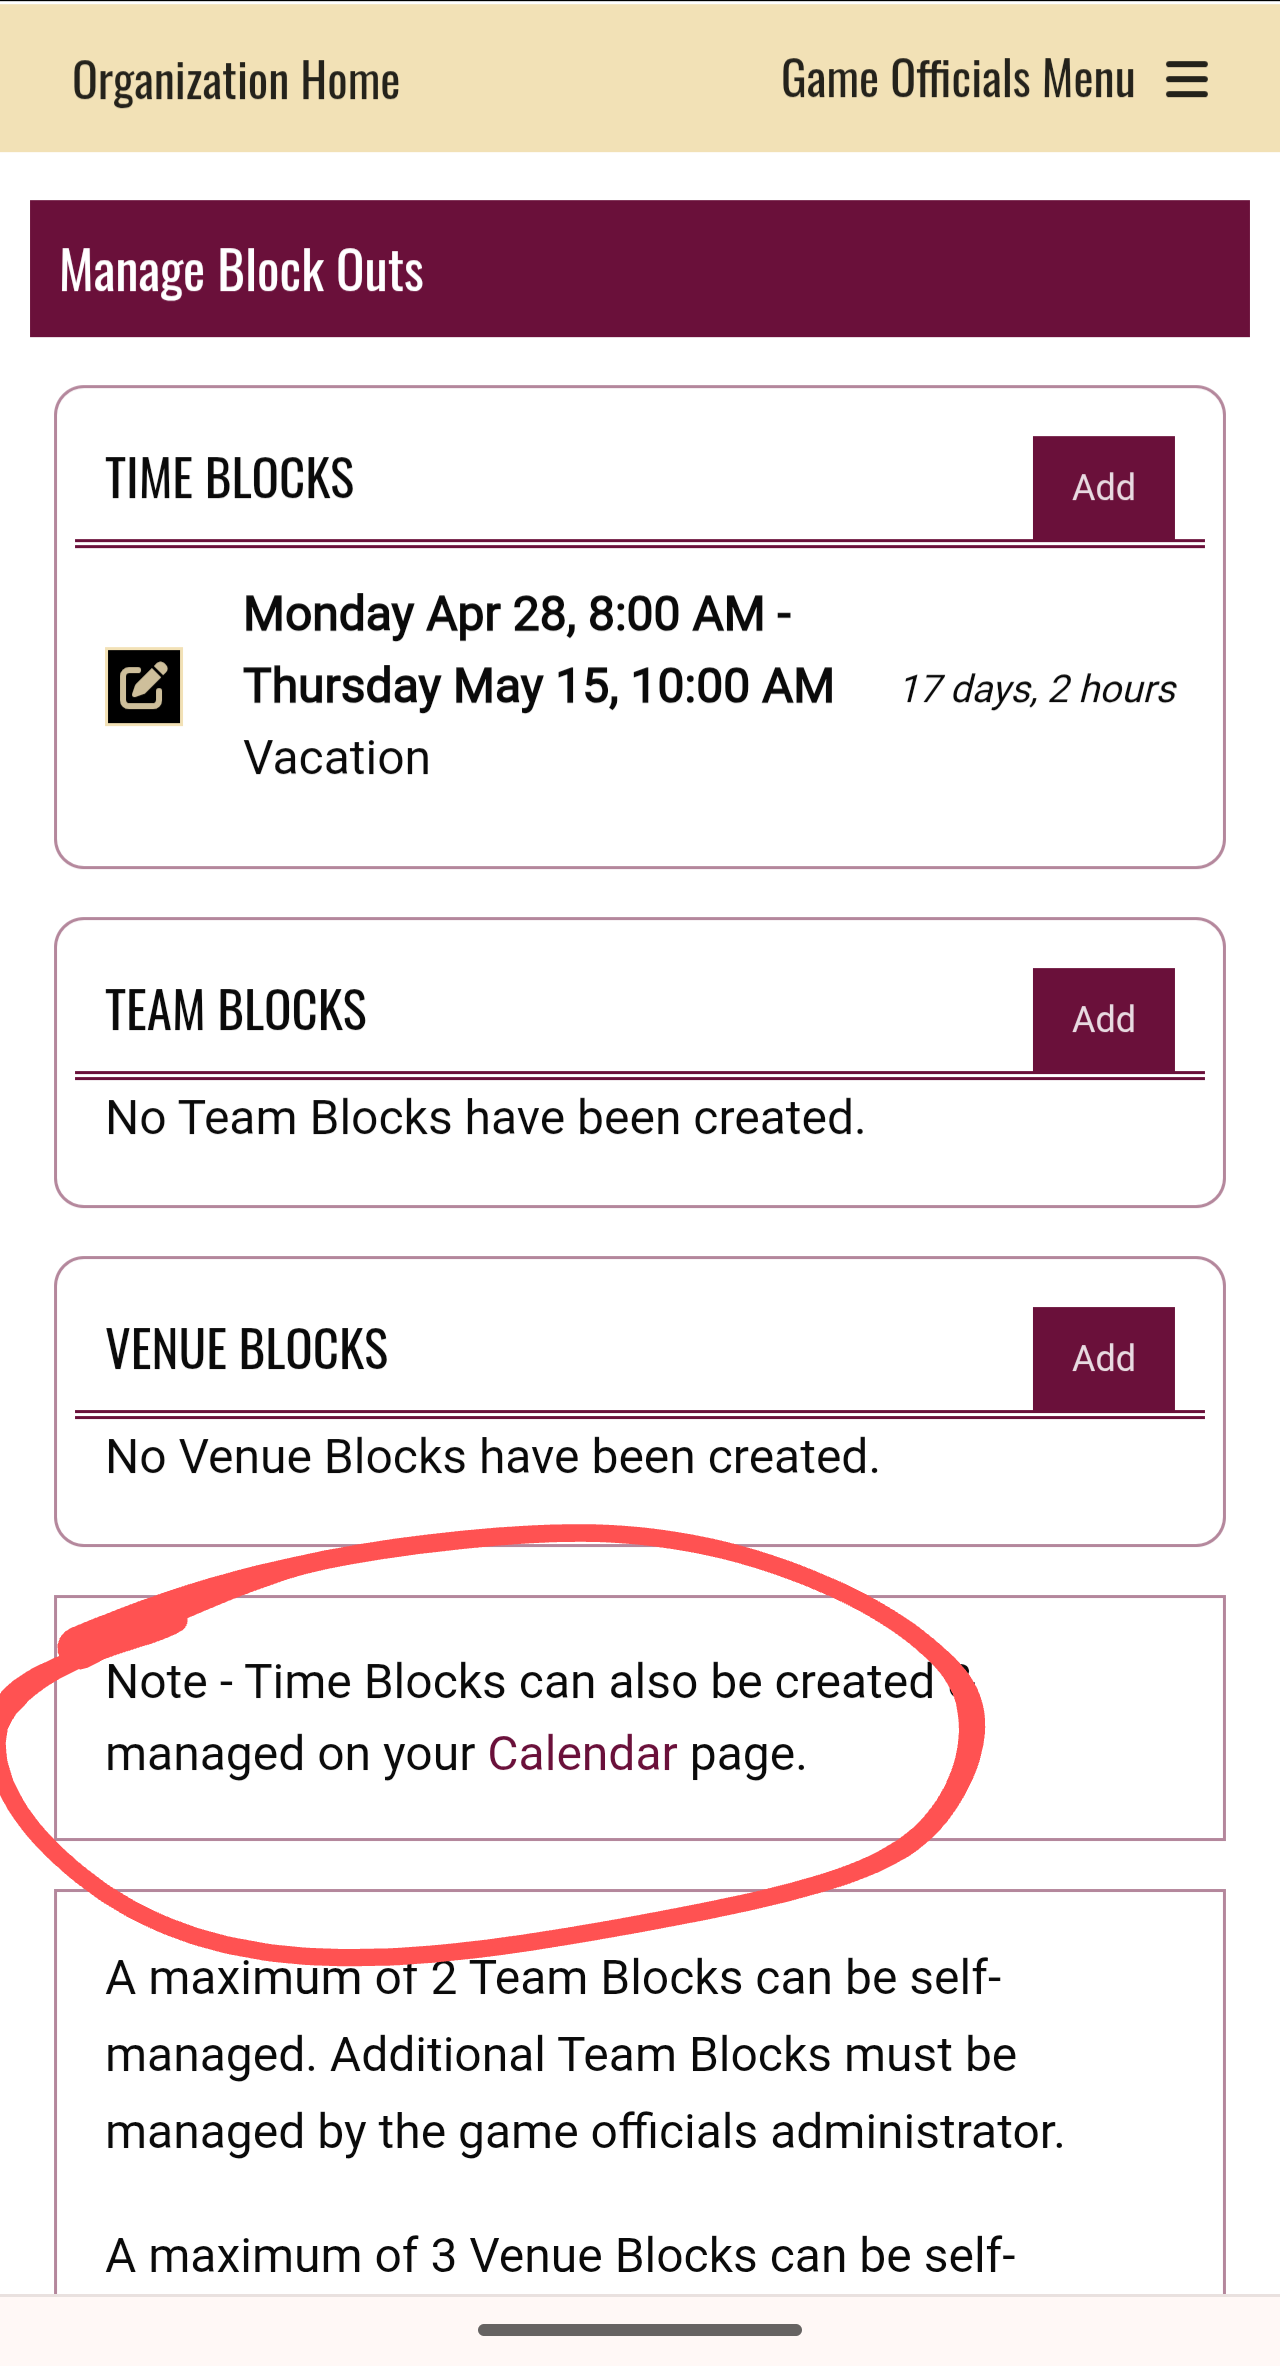
Once clicked, a calendar will open. The dates on this calendar are clickable. To add a blockto any date, click the date in the calendar, then "add new time block" in the bottom section.
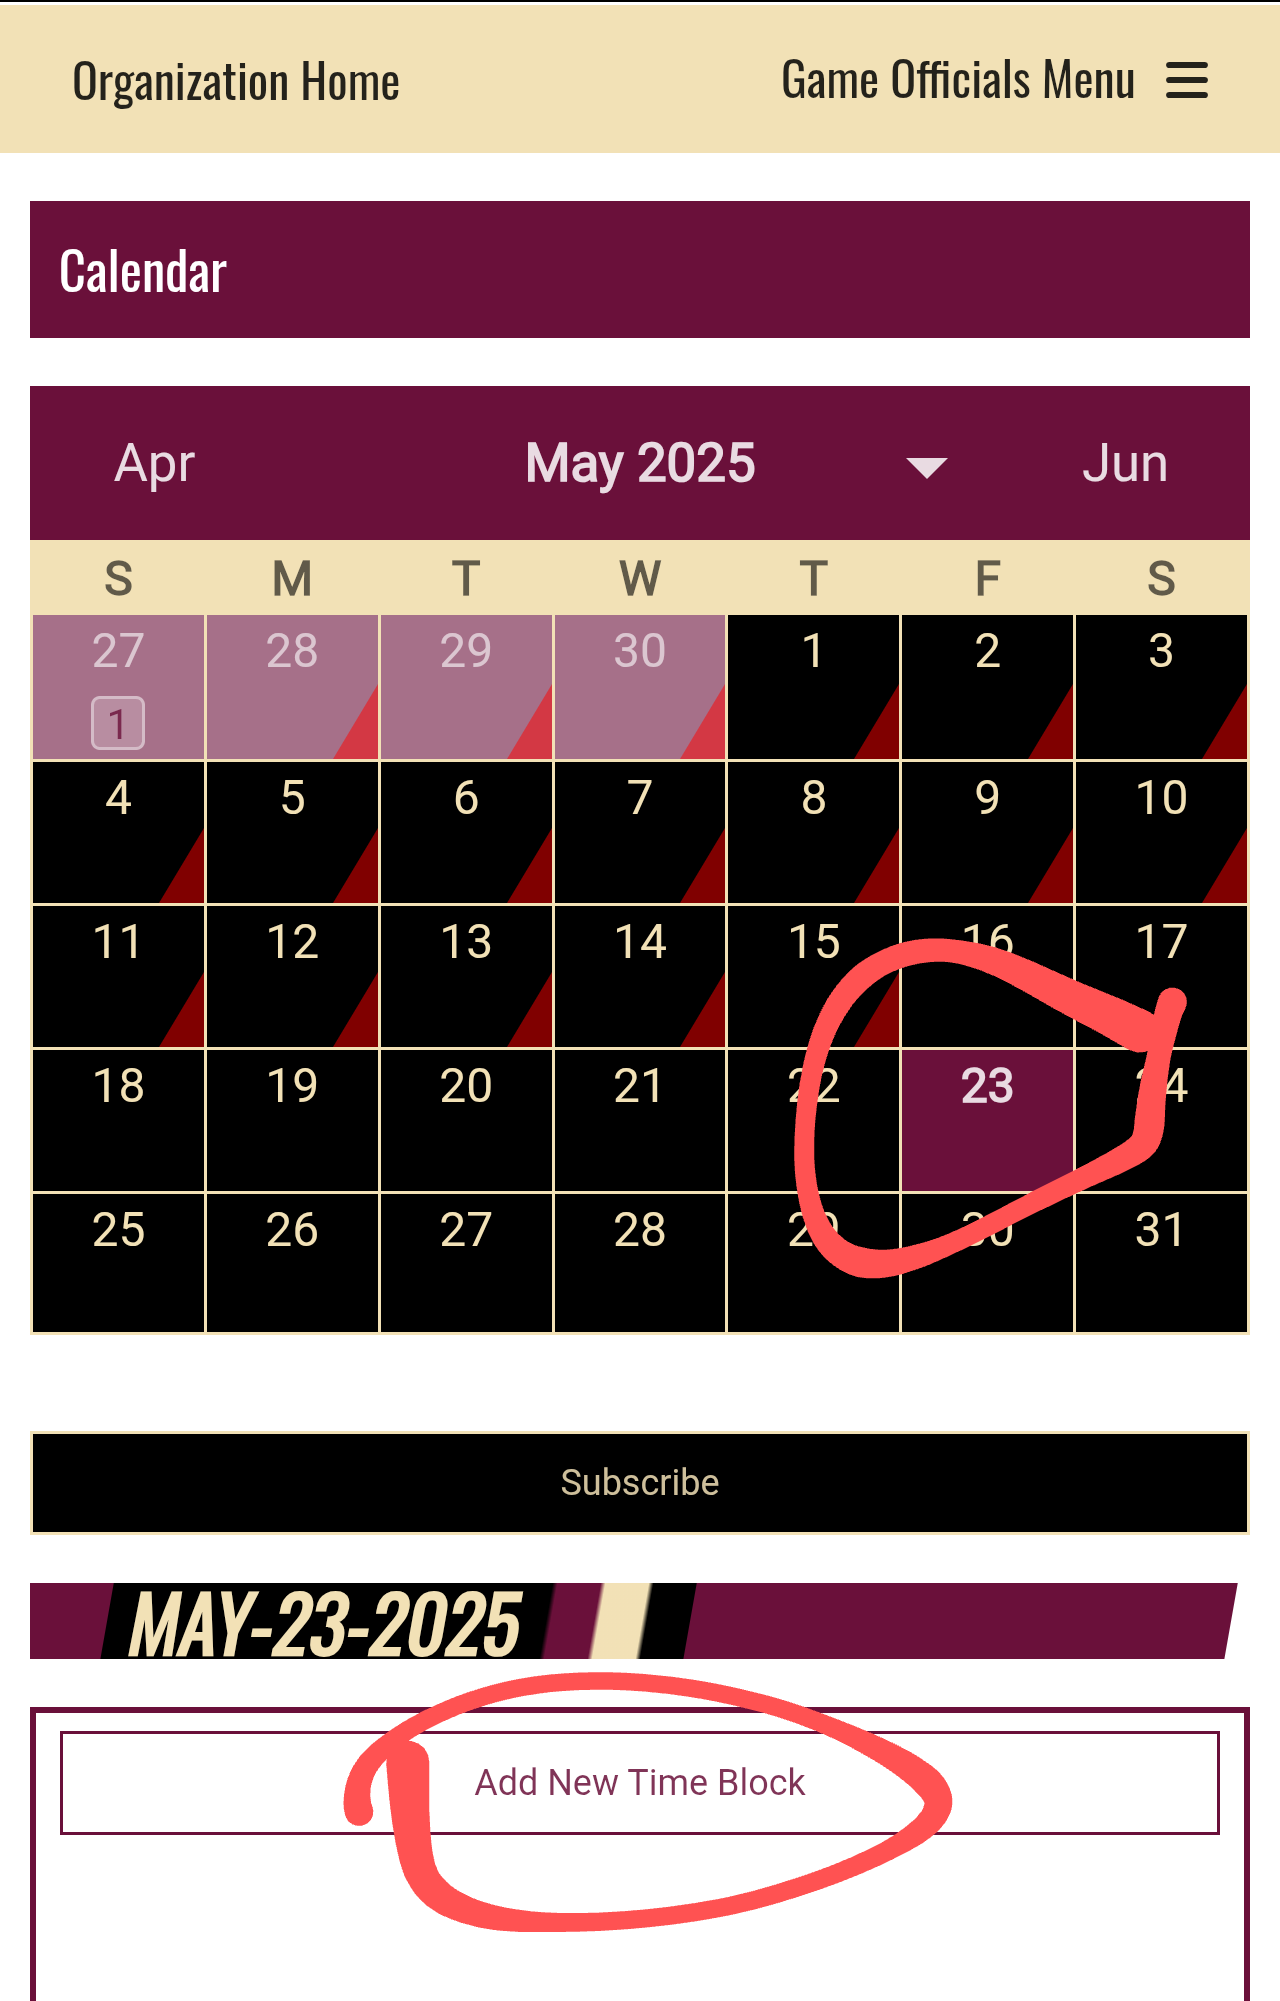
You will then be able to edit the times that you are not available on that date. Click save at the bottom once you have edited your times.
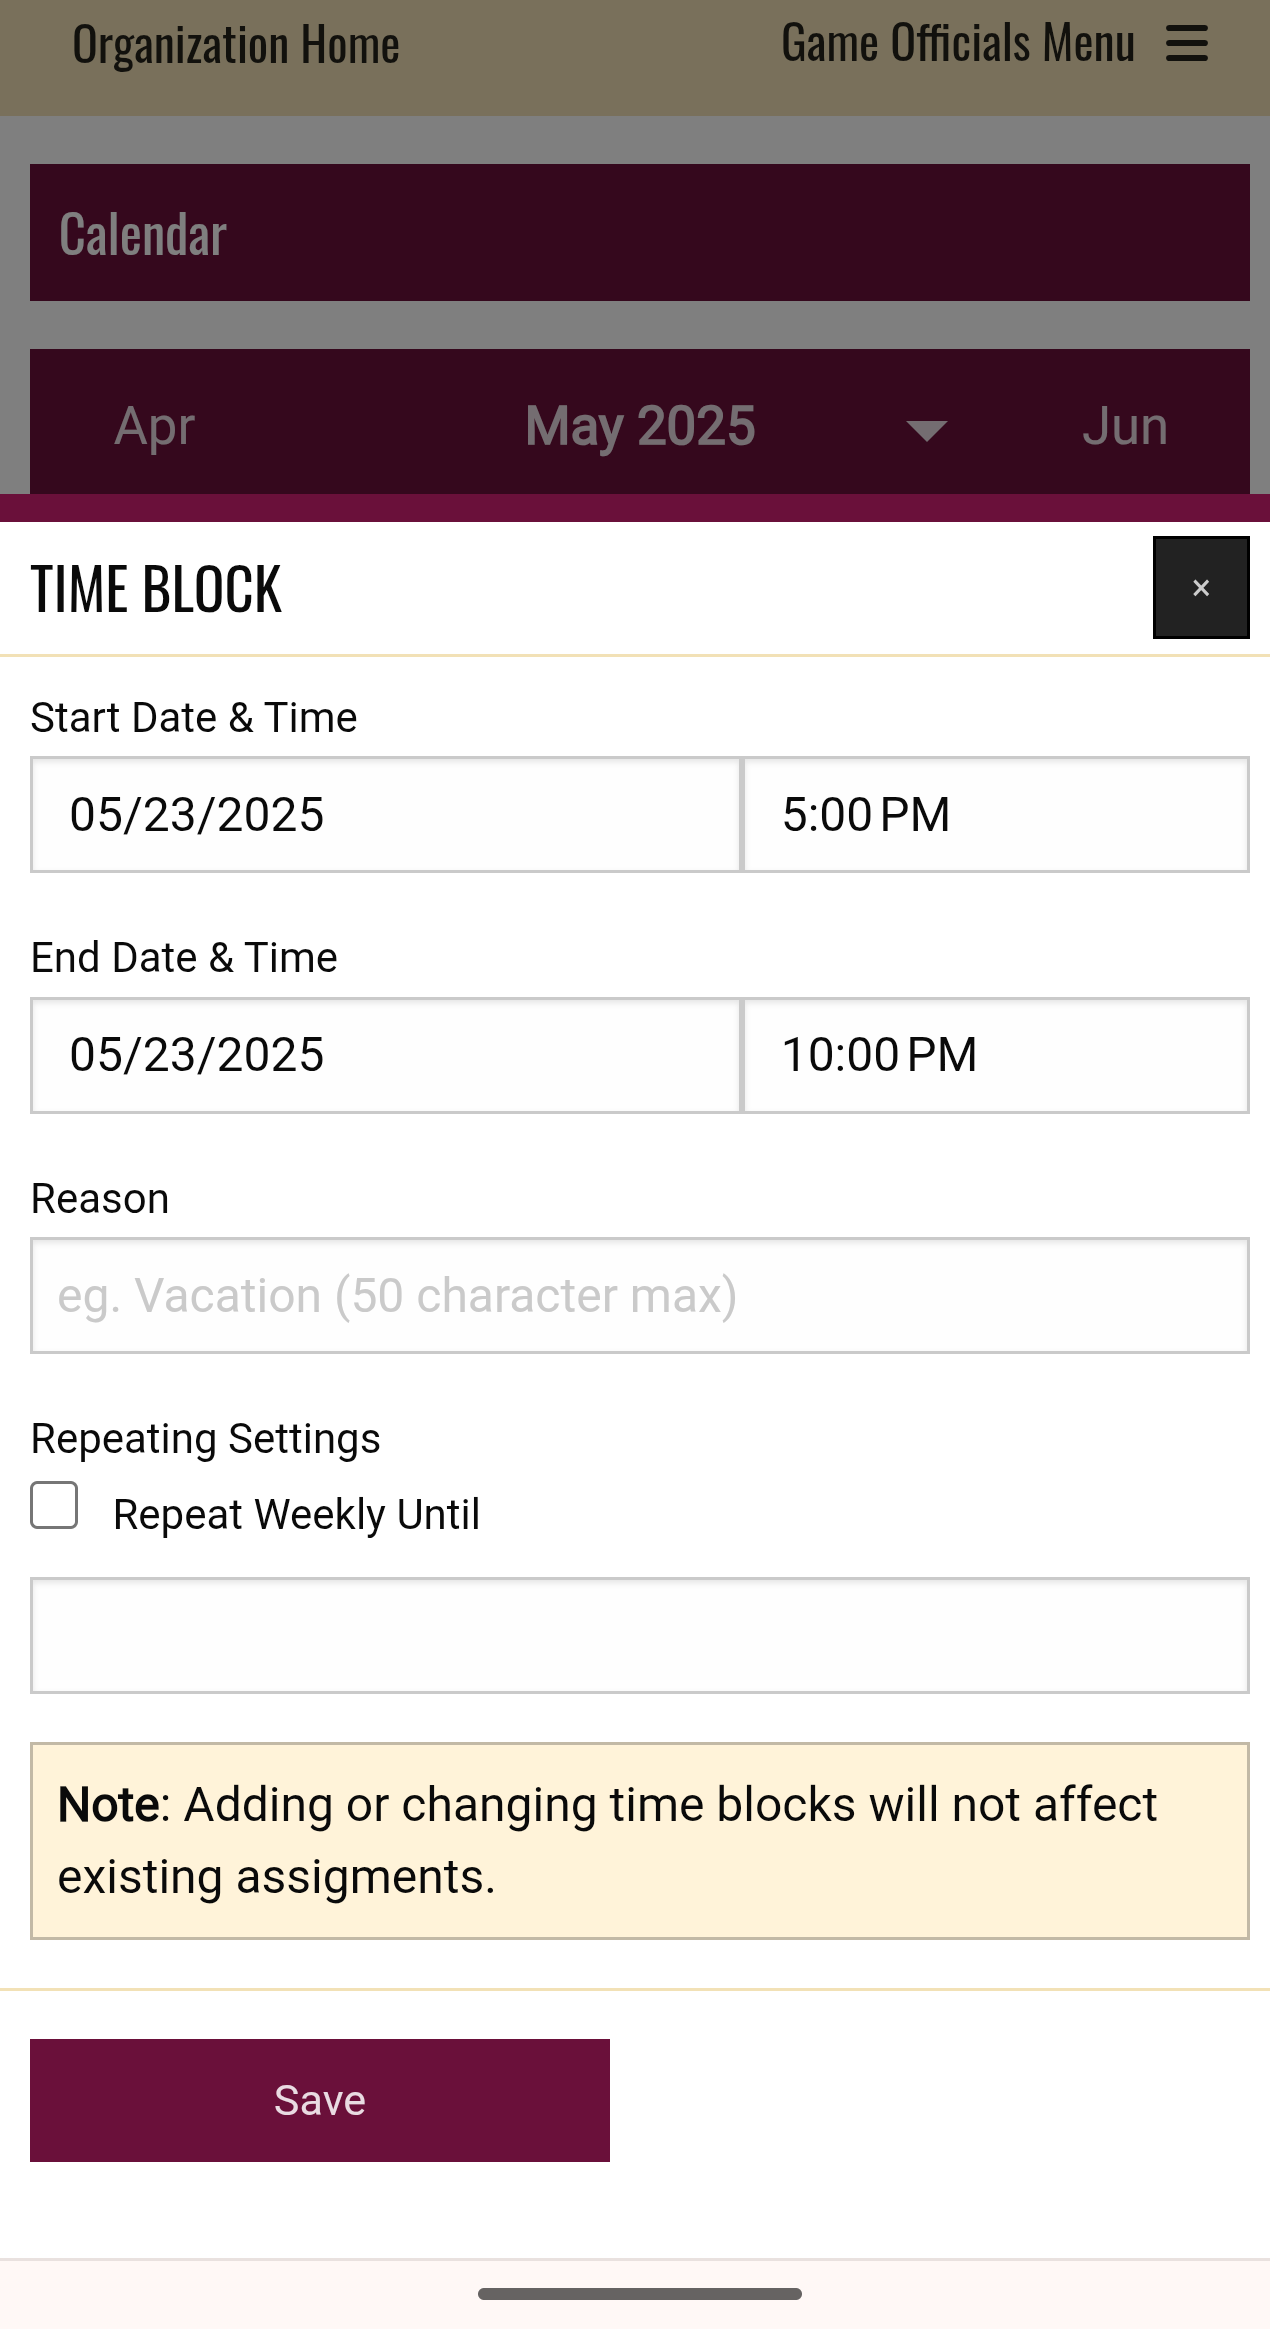
NOTE: it is important to remember to click "SAVE" after you enter the dates/times for each time block, and to verify that your blocks are accurate in the summary page.
Adding team or venue blocks
You are able to block yourself from being assigned to certain teams/venues if you have a conflict (IE a sibling plays on the team) or there is a diamond that is not accessible to you. These blocks are subject to approval by our
UIC and
umpire scheduler - please reach out to them BEFORE adding a block. You can add or remove these blocks from the
manage block outs page. Select add for either the team block or venue block
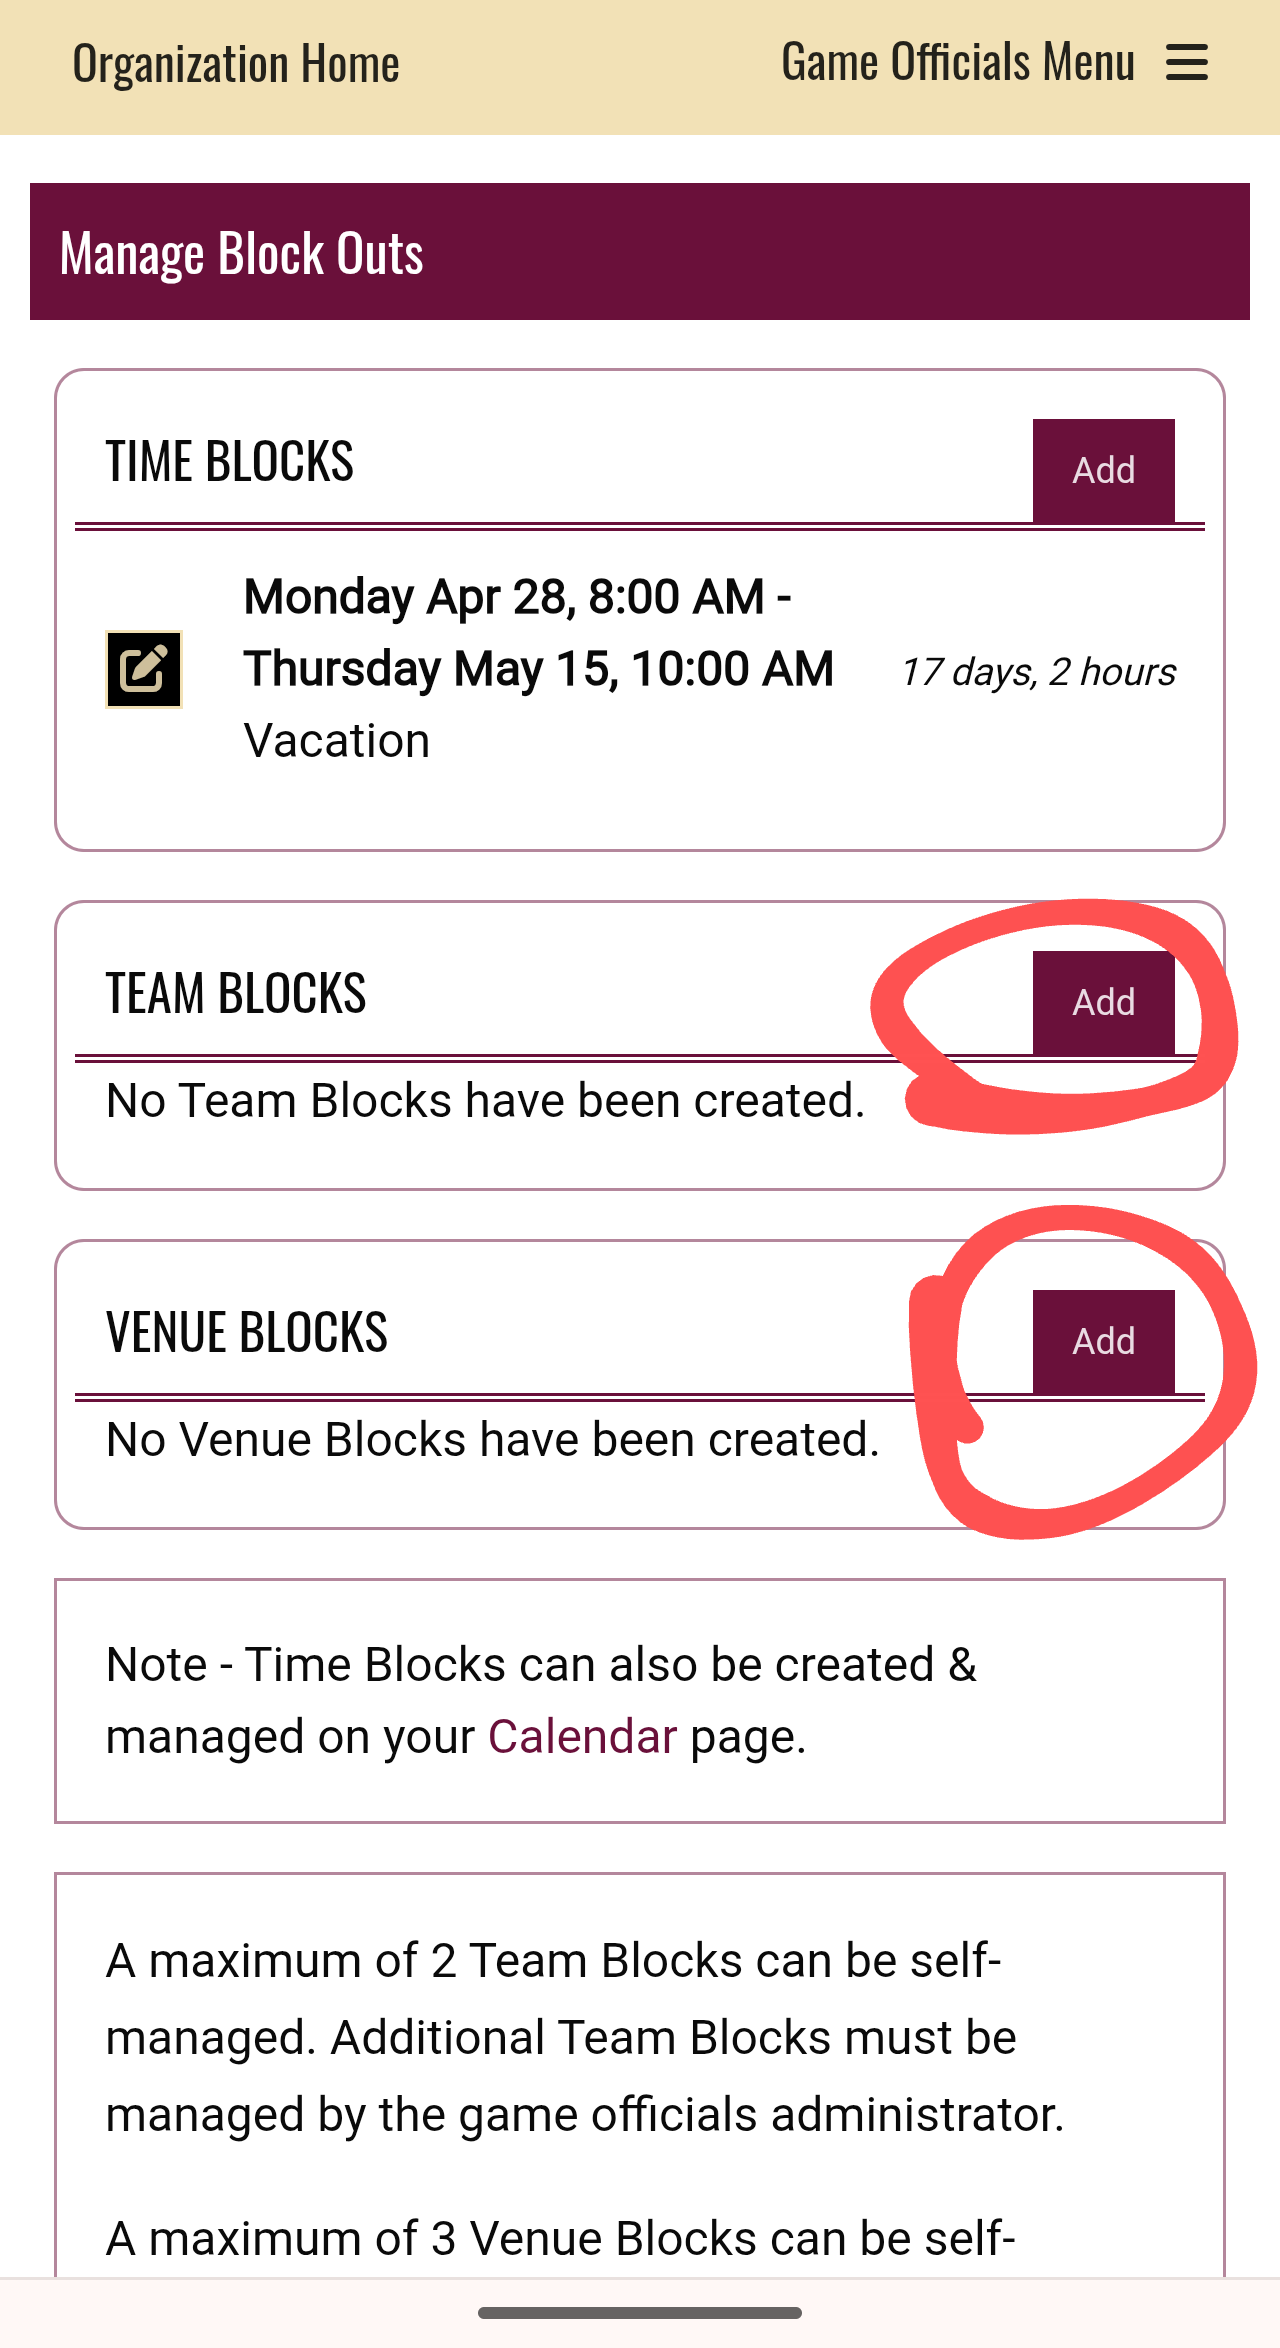
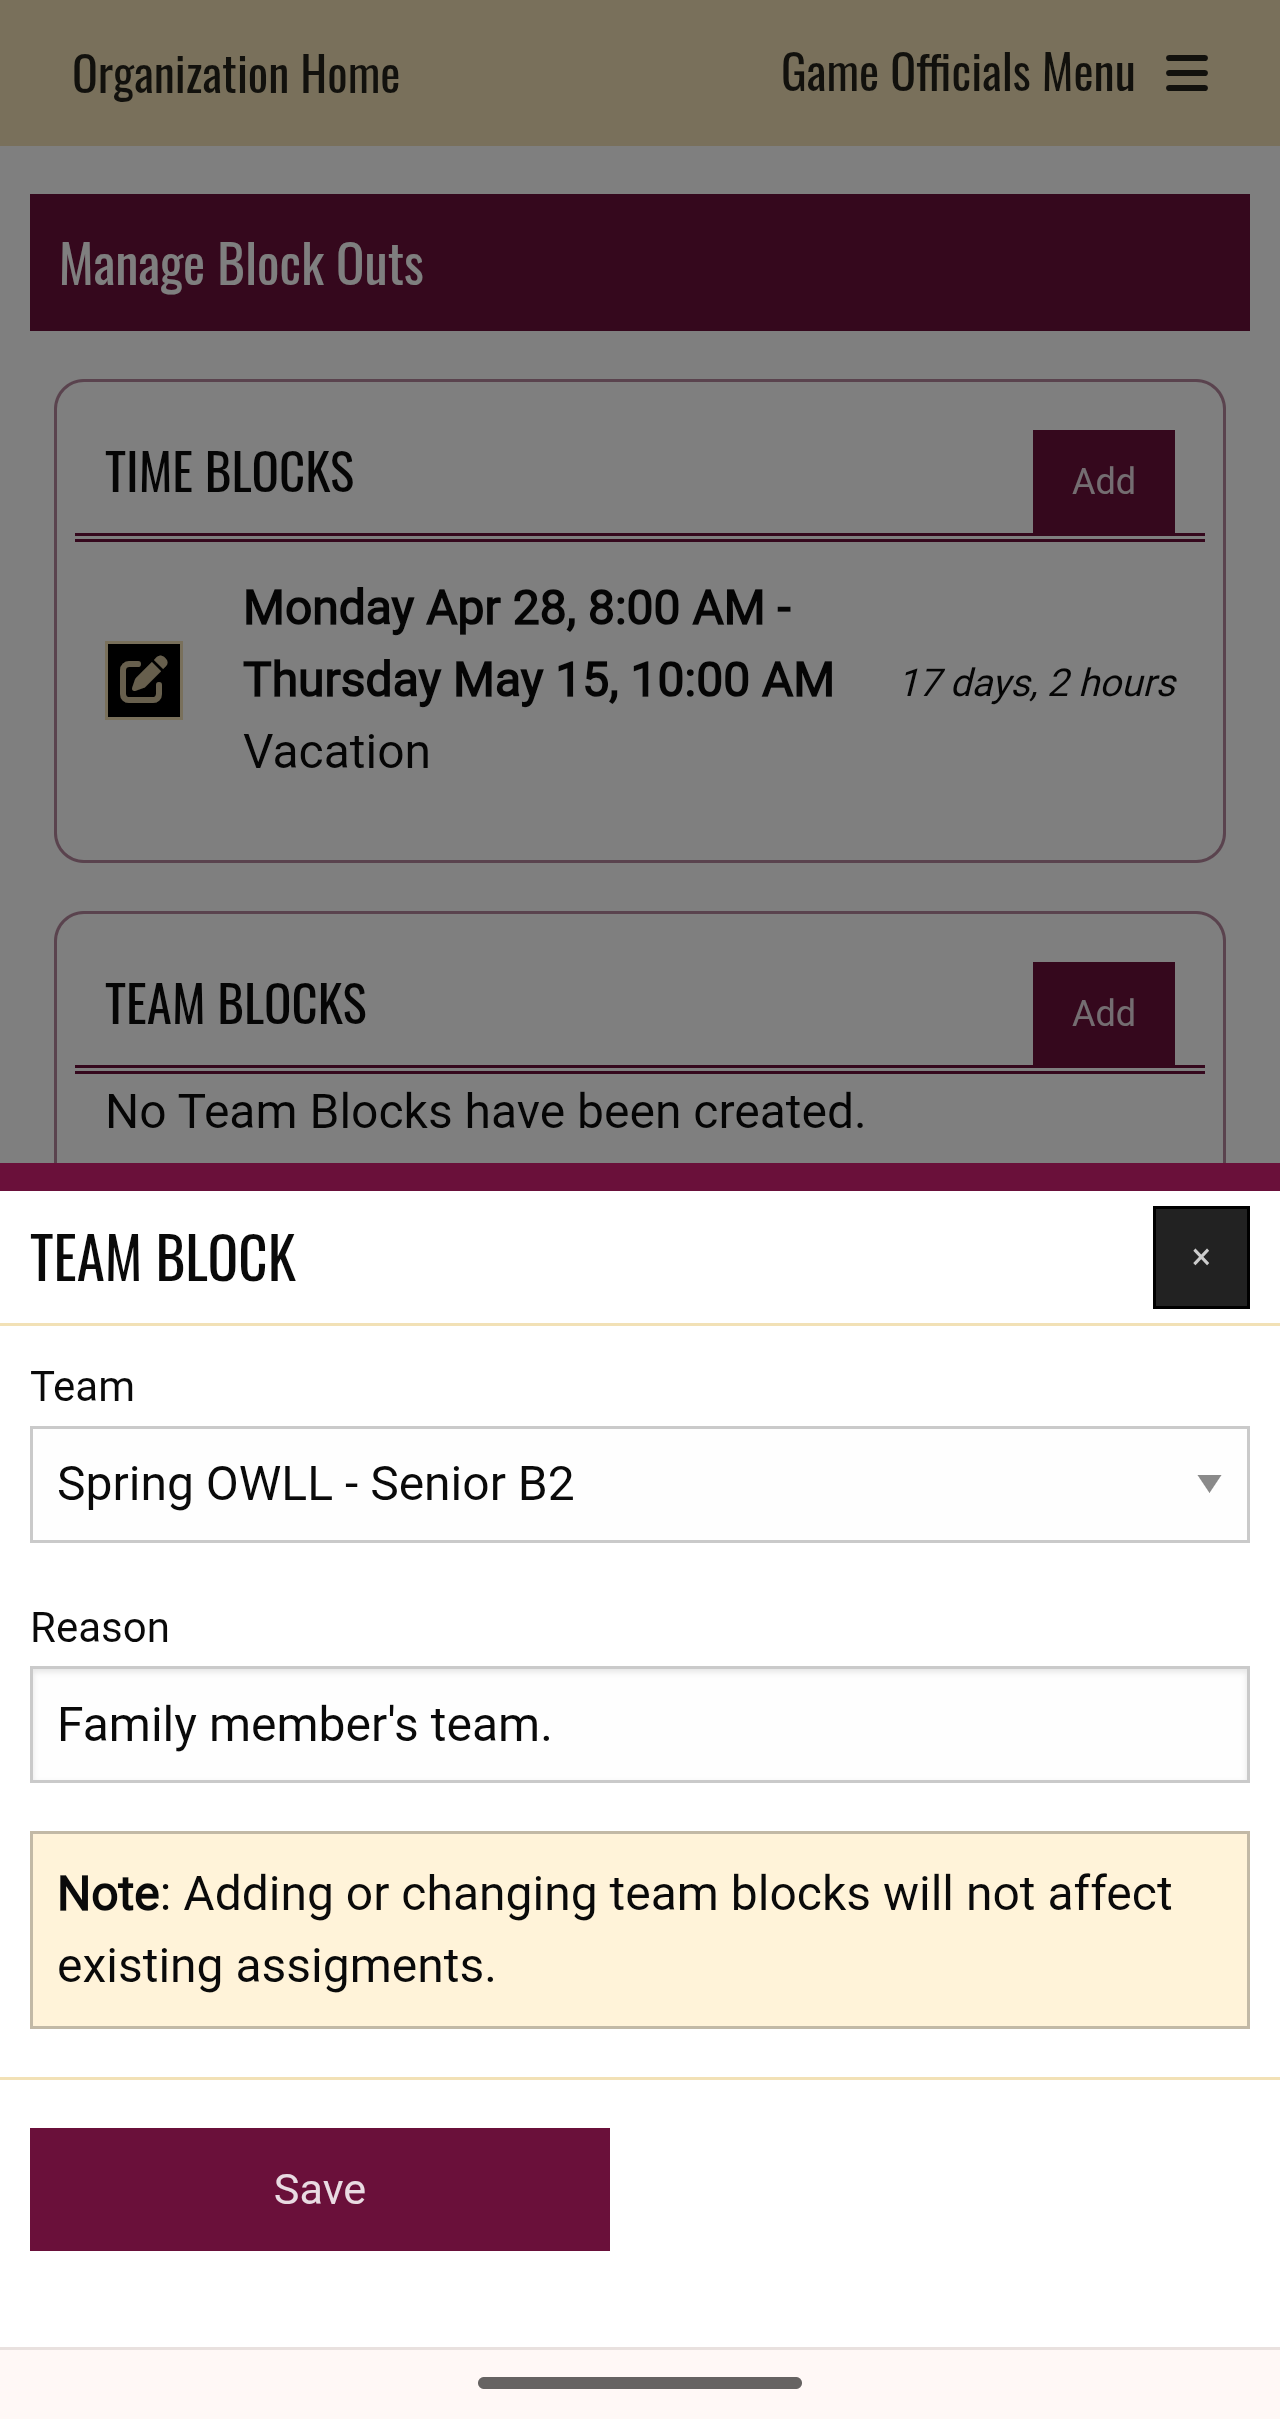
The process is the same for entering team or venue blocks. From the dropdown list, select the applicable team or venue, then fill in the reason for the block, and finally click save.
NOTE: adding a block will not remove you from games previously assigned. If this happens, reach out to our umpire scheduler.
Accepting/declining games:
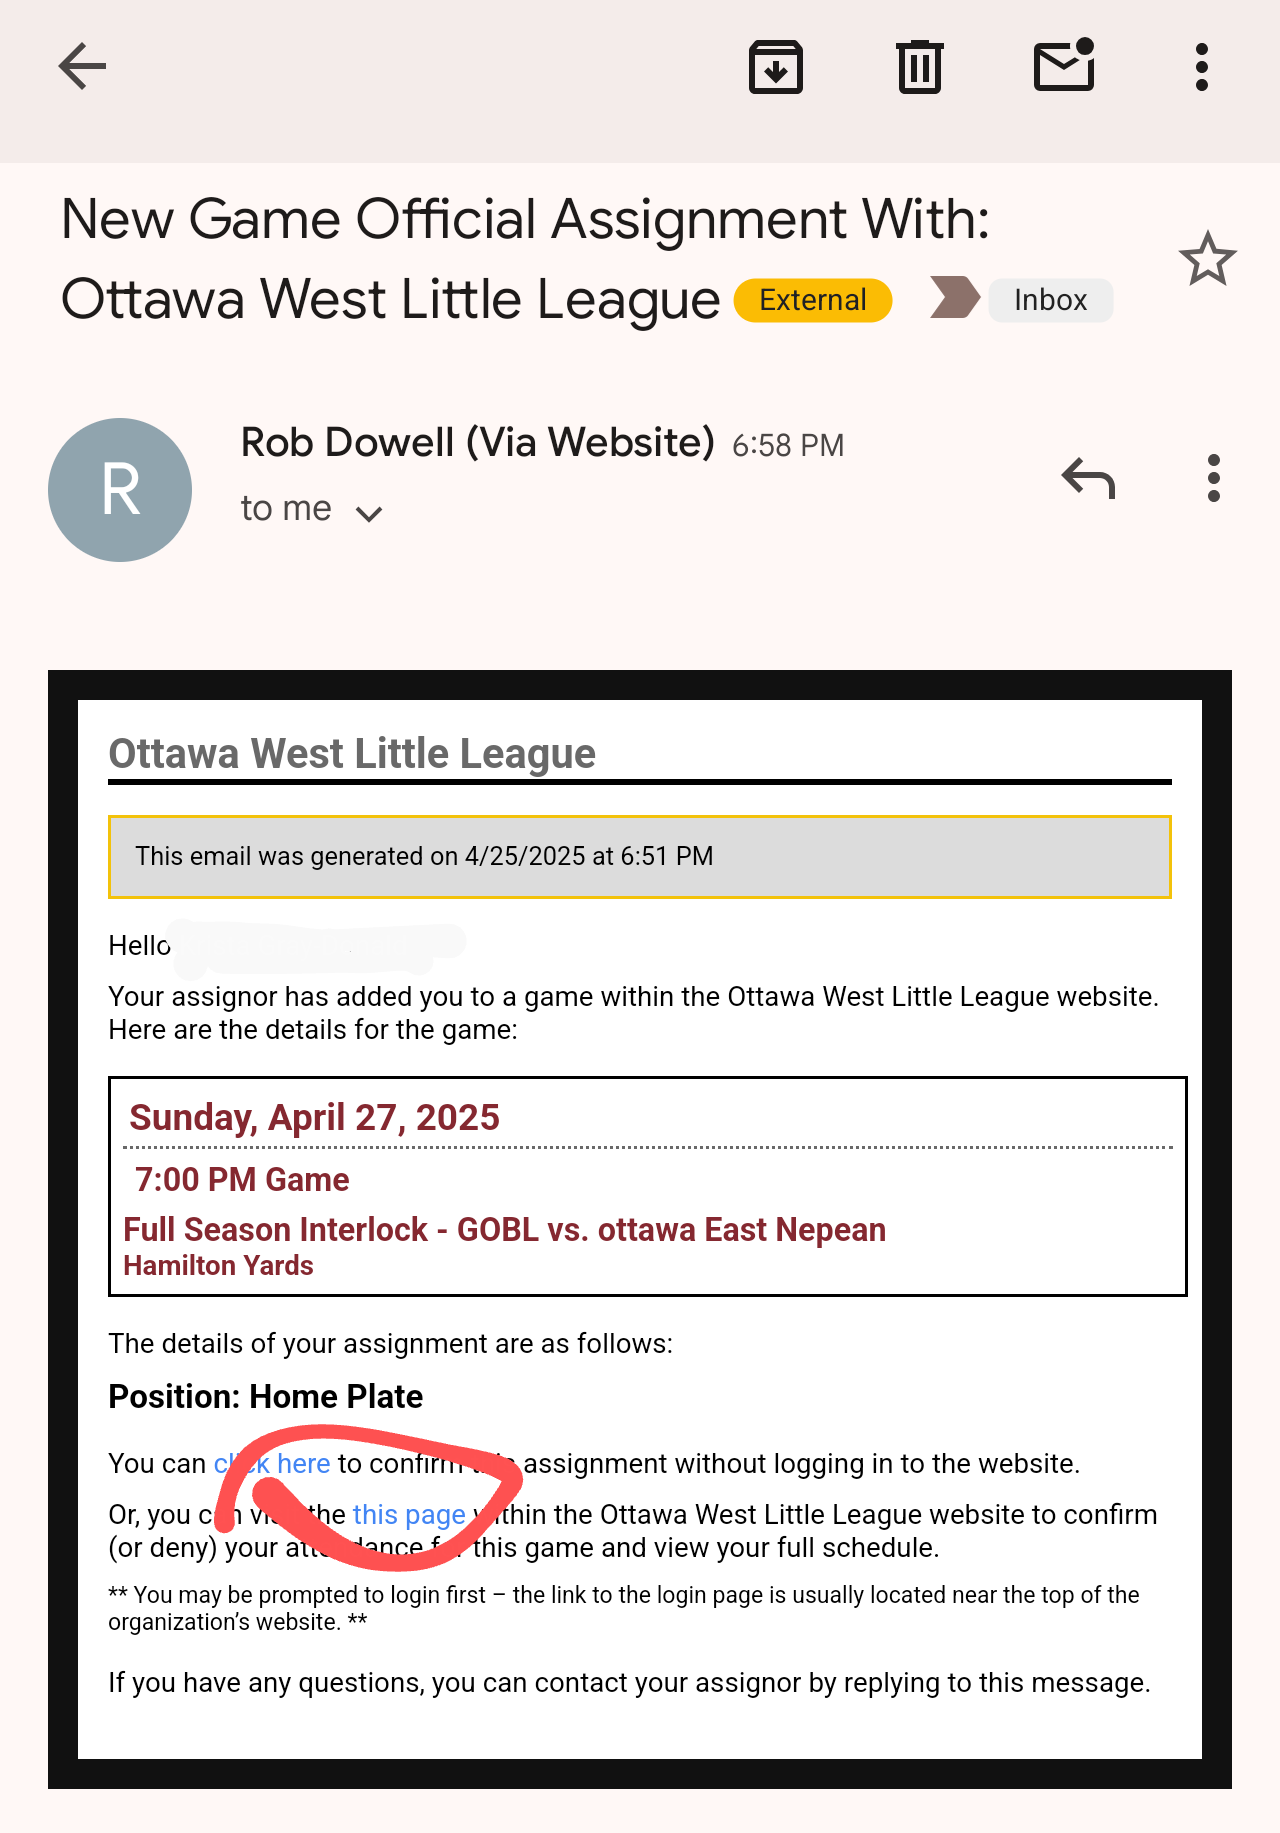
Once you have been assigned a game to umpire, you will receive a notice from our umpire scheduler in your email. It will provide the date, time, schedule, location, and your position for the game. It looks like this:
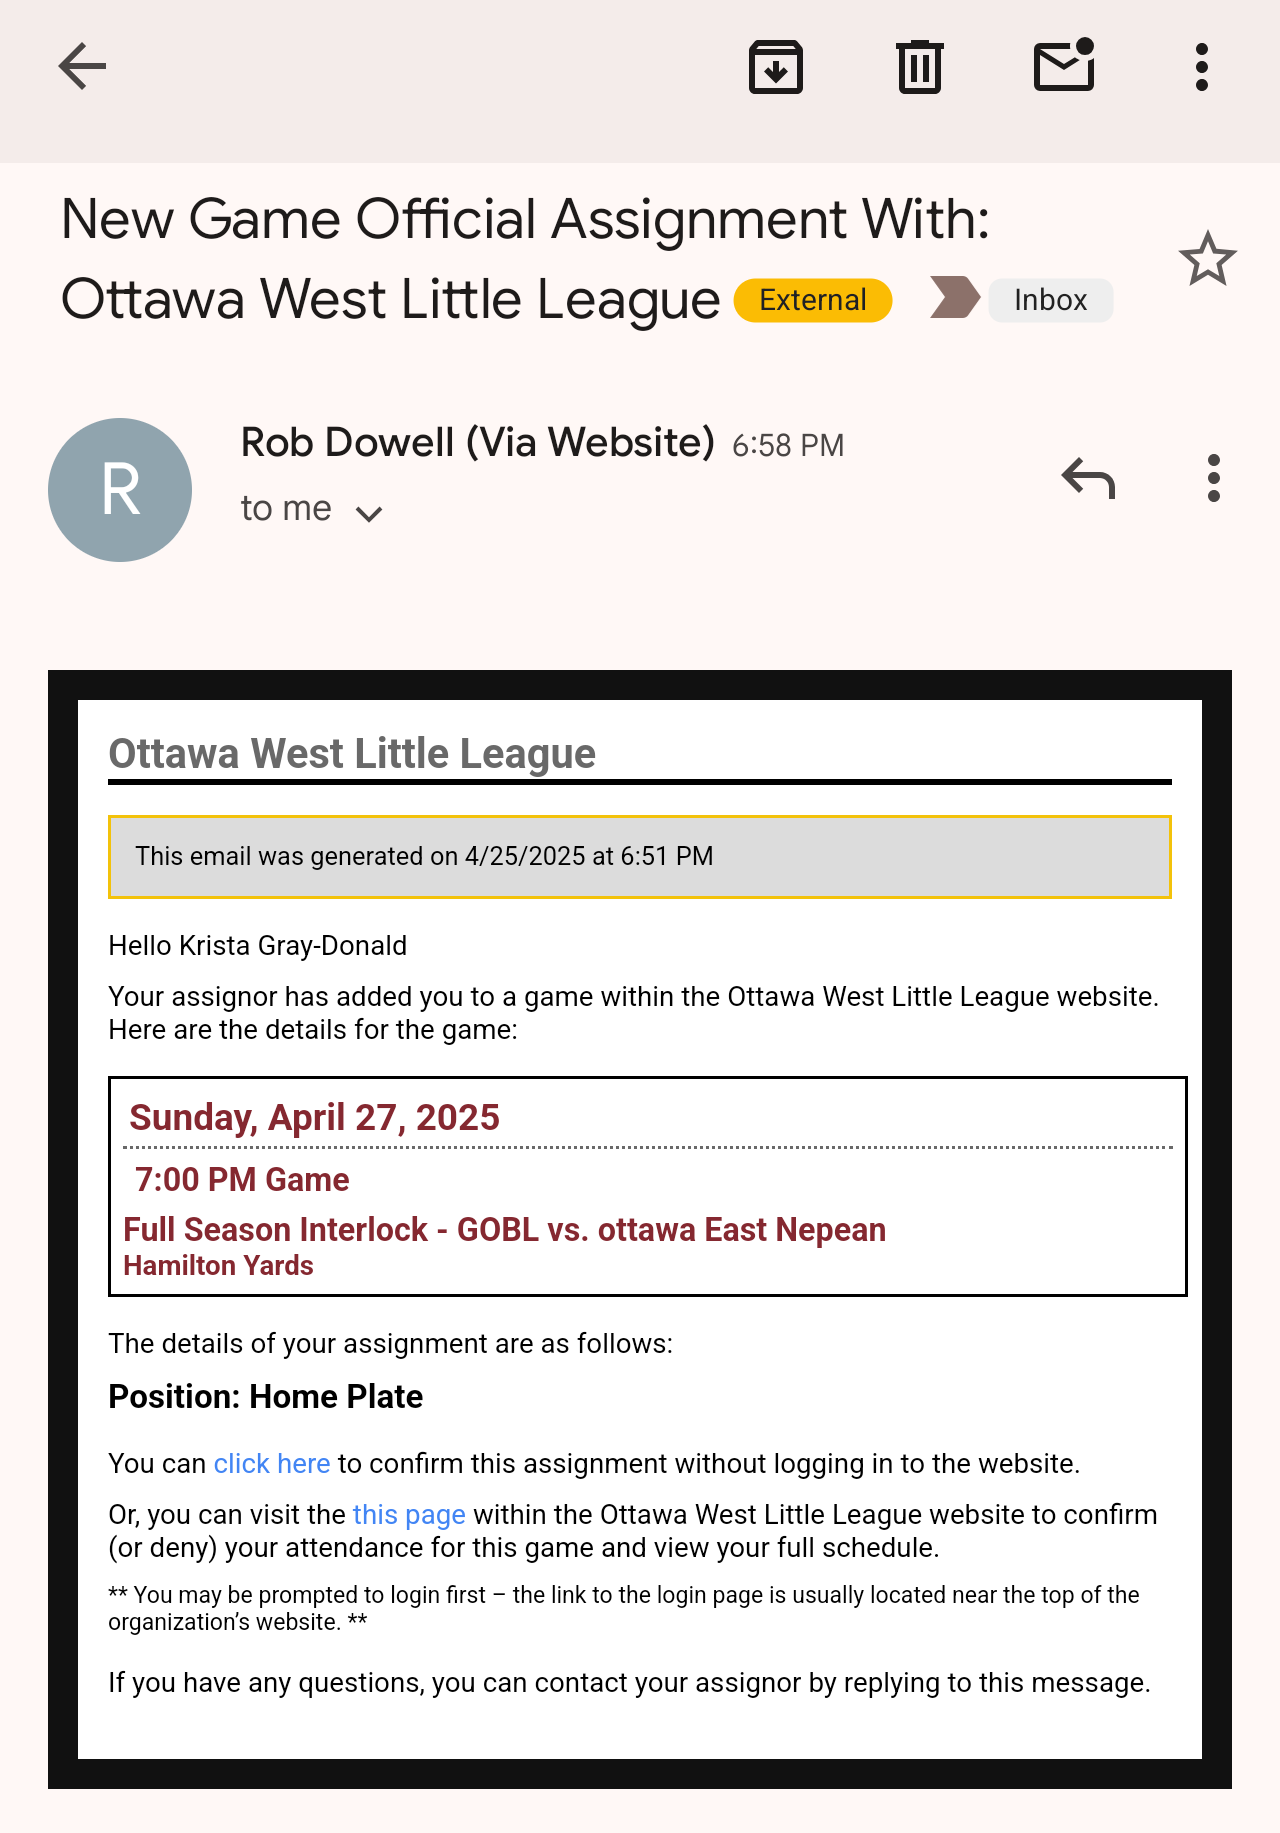
You have two options once you receive the email. You can confirm immediately without logging in to the
officials portal by clicking on the first link in the text.
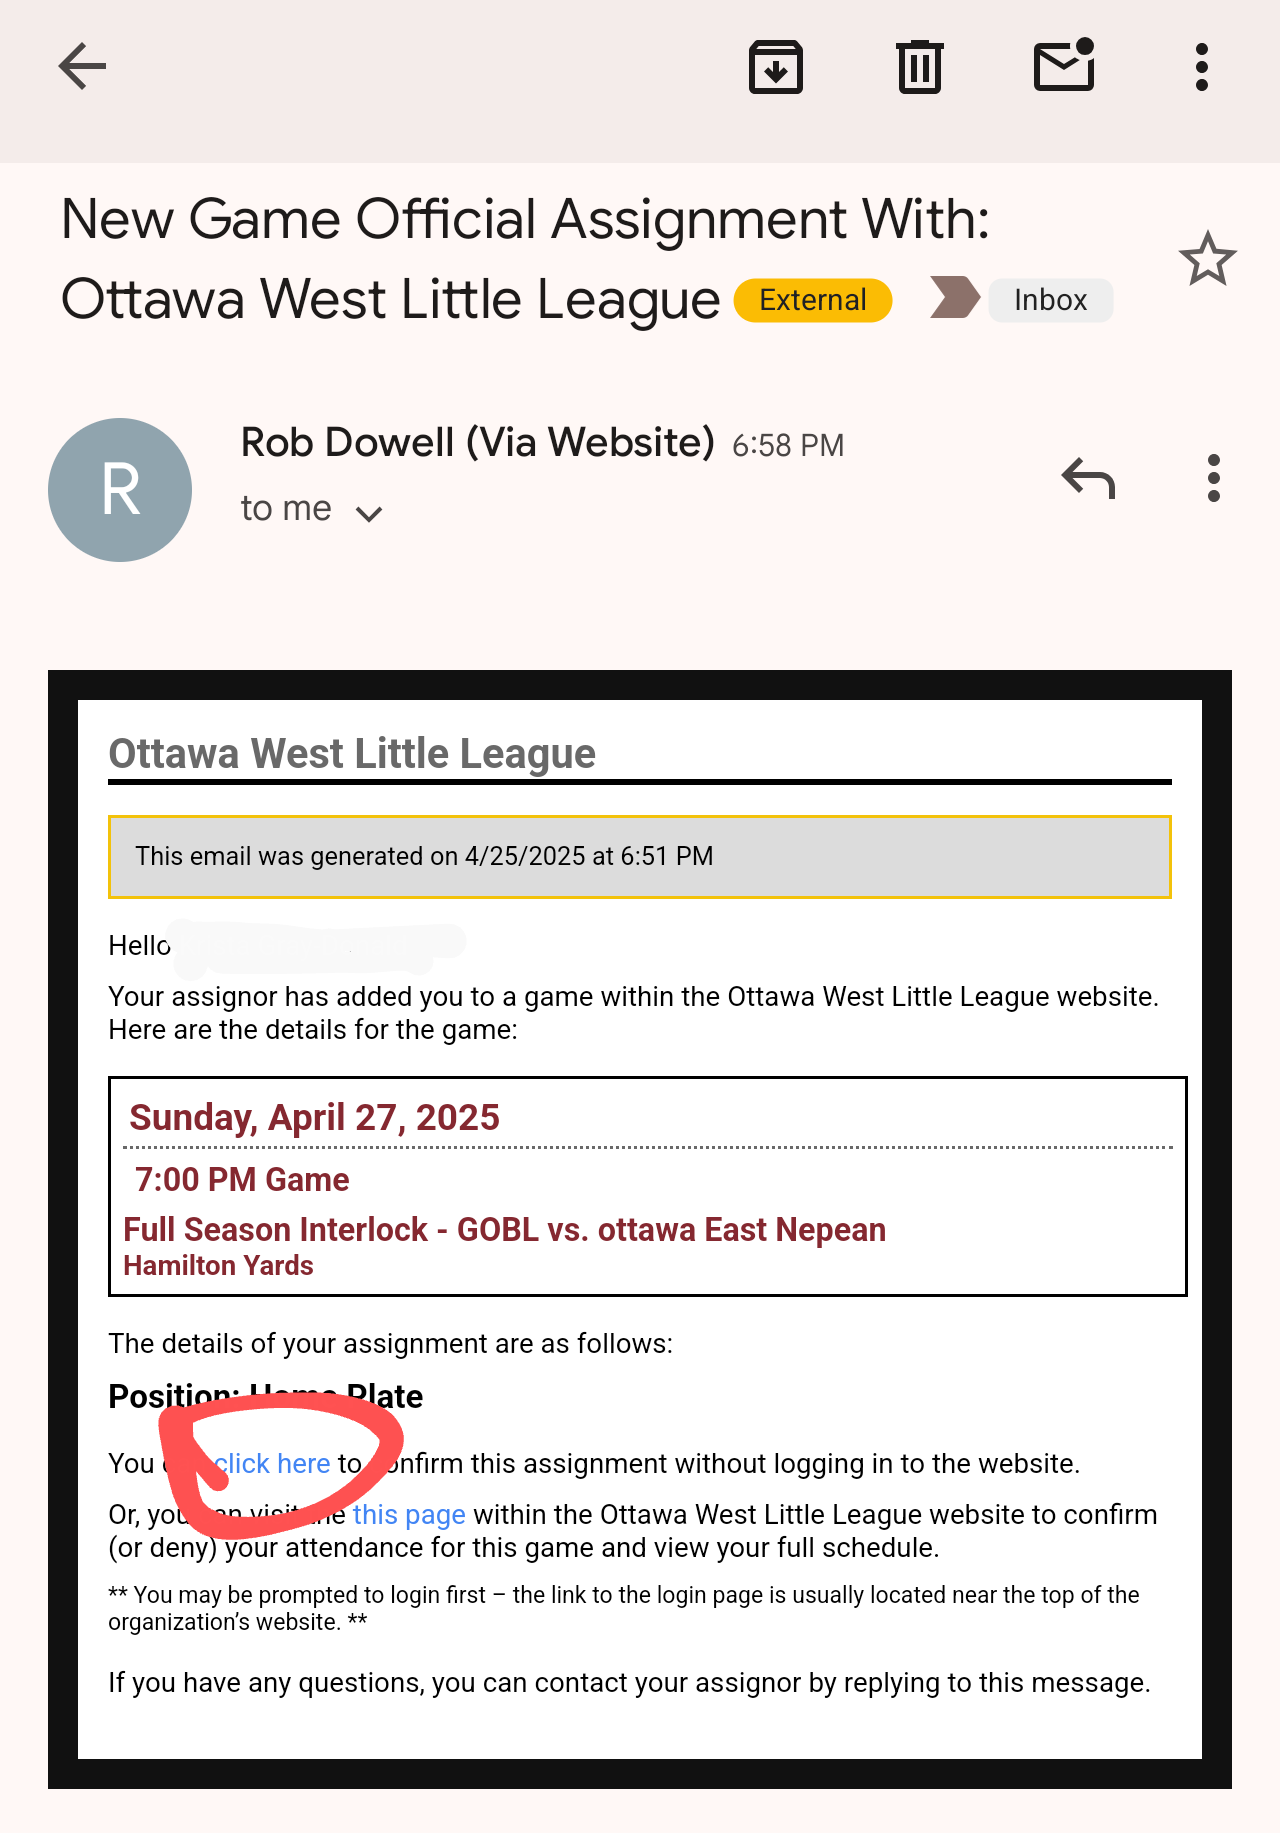
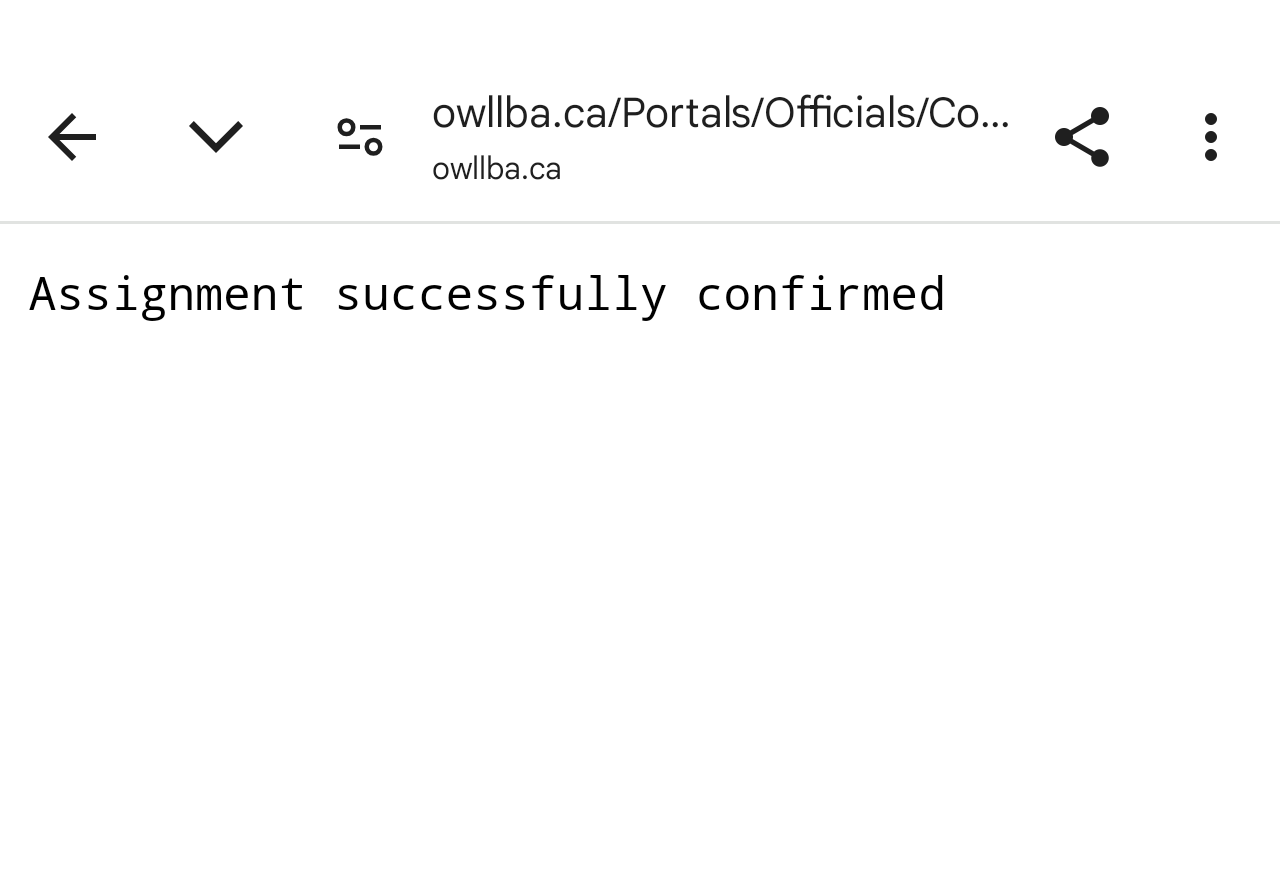
Once you click on this link, you will get a simple message indicating that the game assignment was confirmed
The second option is to confirm via the
officials portal. Clicking on this option will prompt you to
login in to the portal.
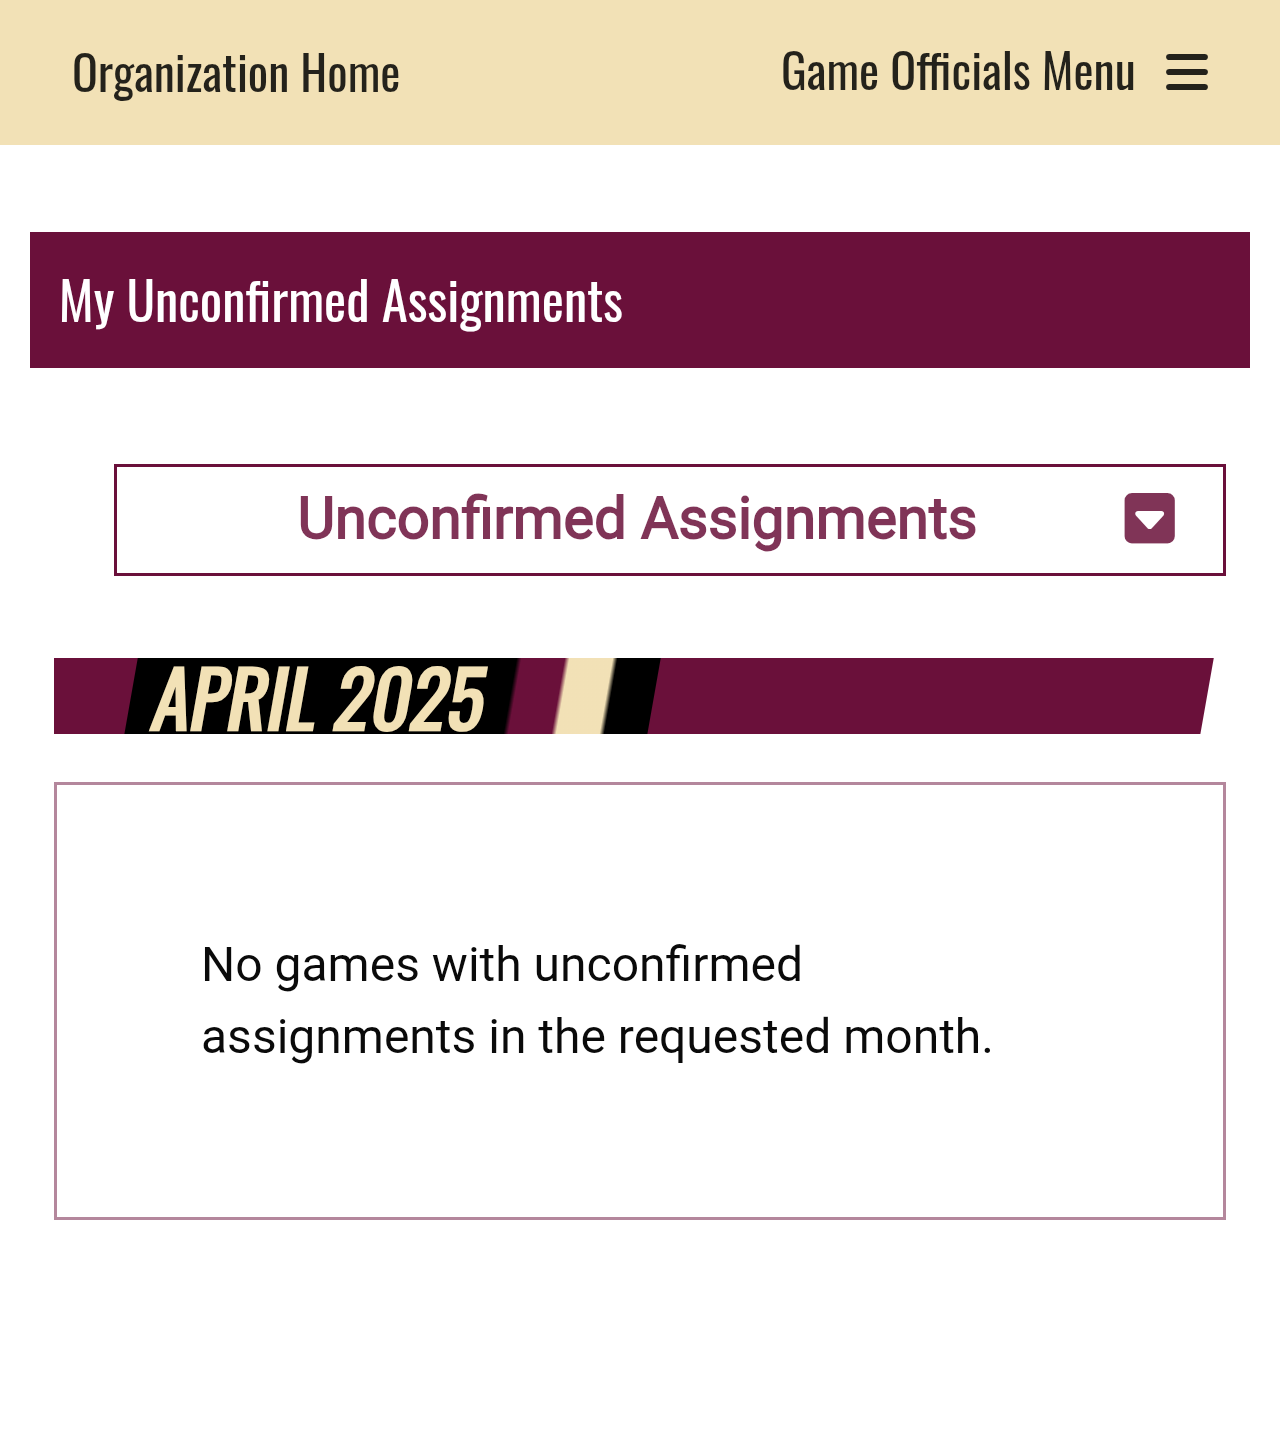
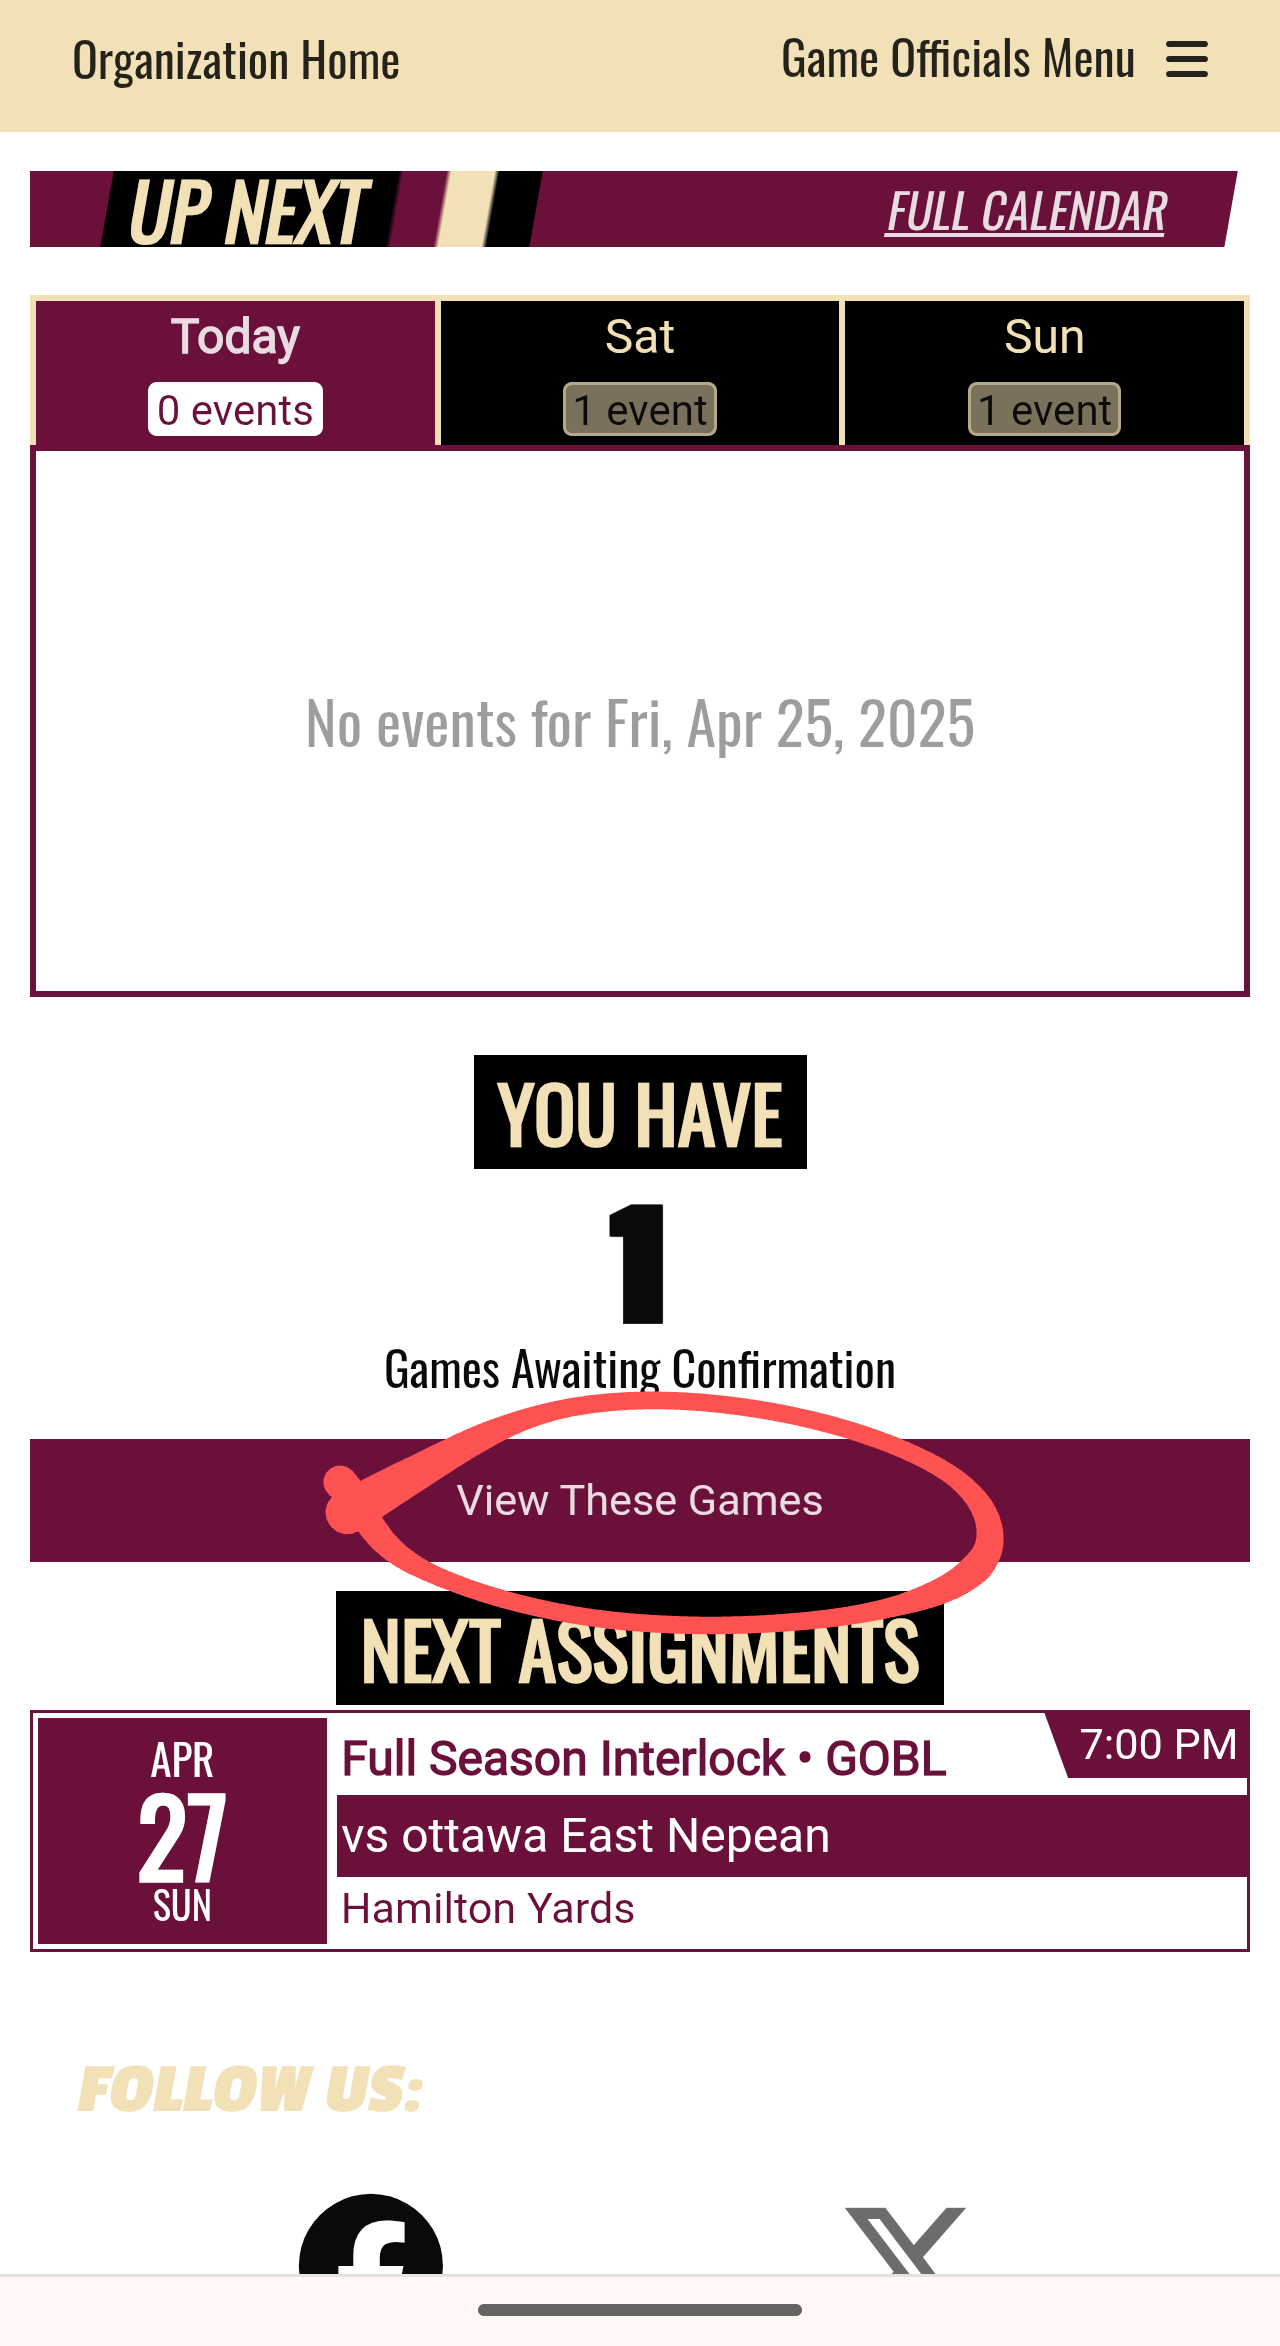
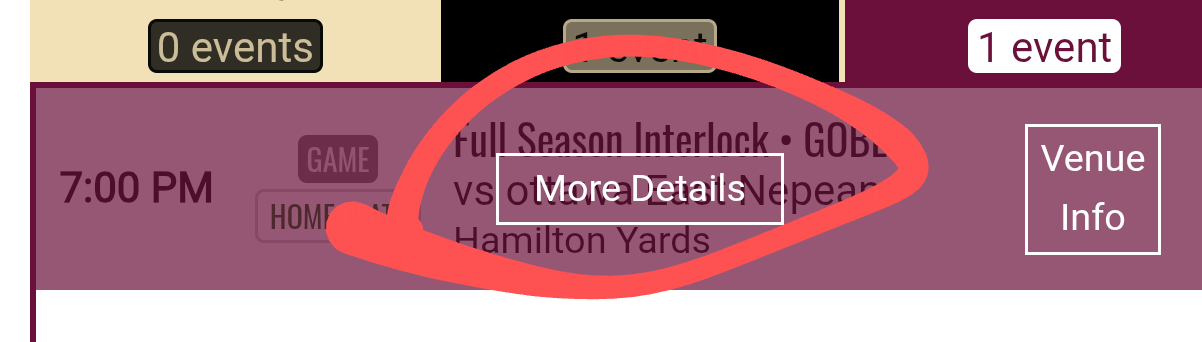
Once you have logged in, your status screen will load. Click on "view these games" in the middle of the screen.
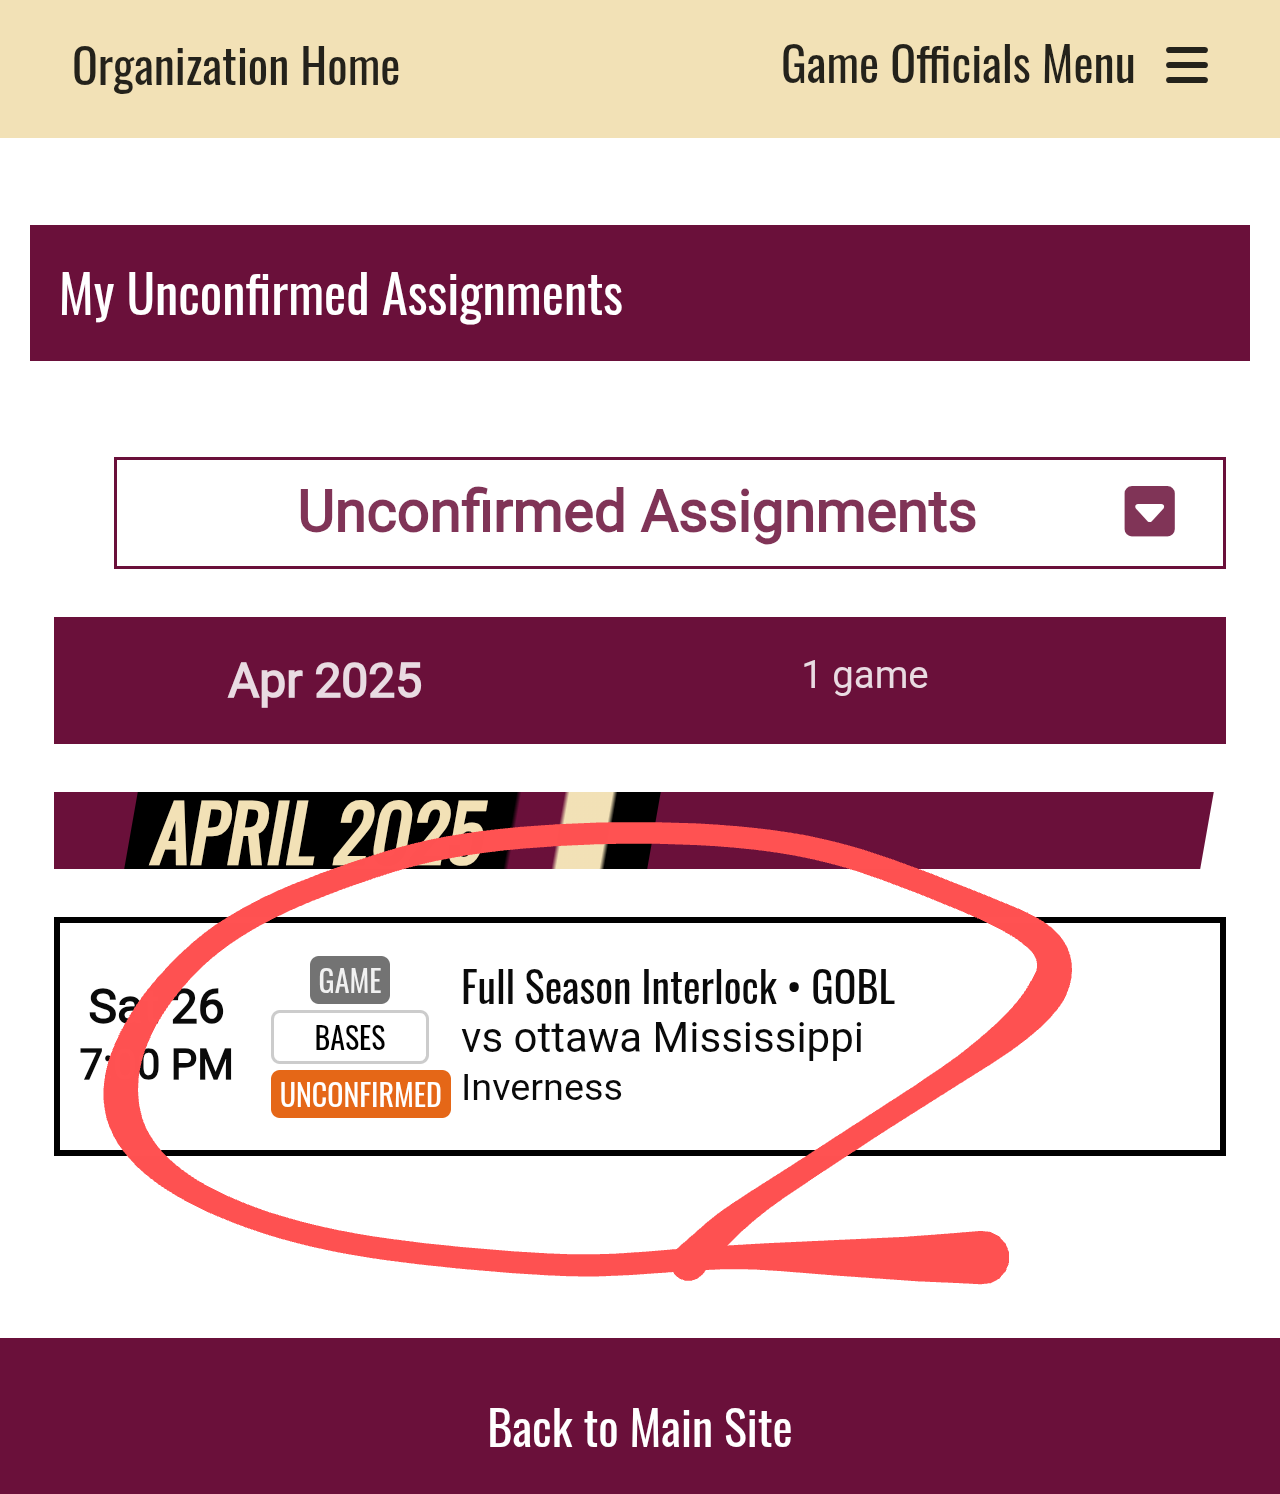
Click on the unconfirmed game that you wish to confirm. If the game information doesn't load instantly, click on "more details".
Once the game details load, click confirm assignment
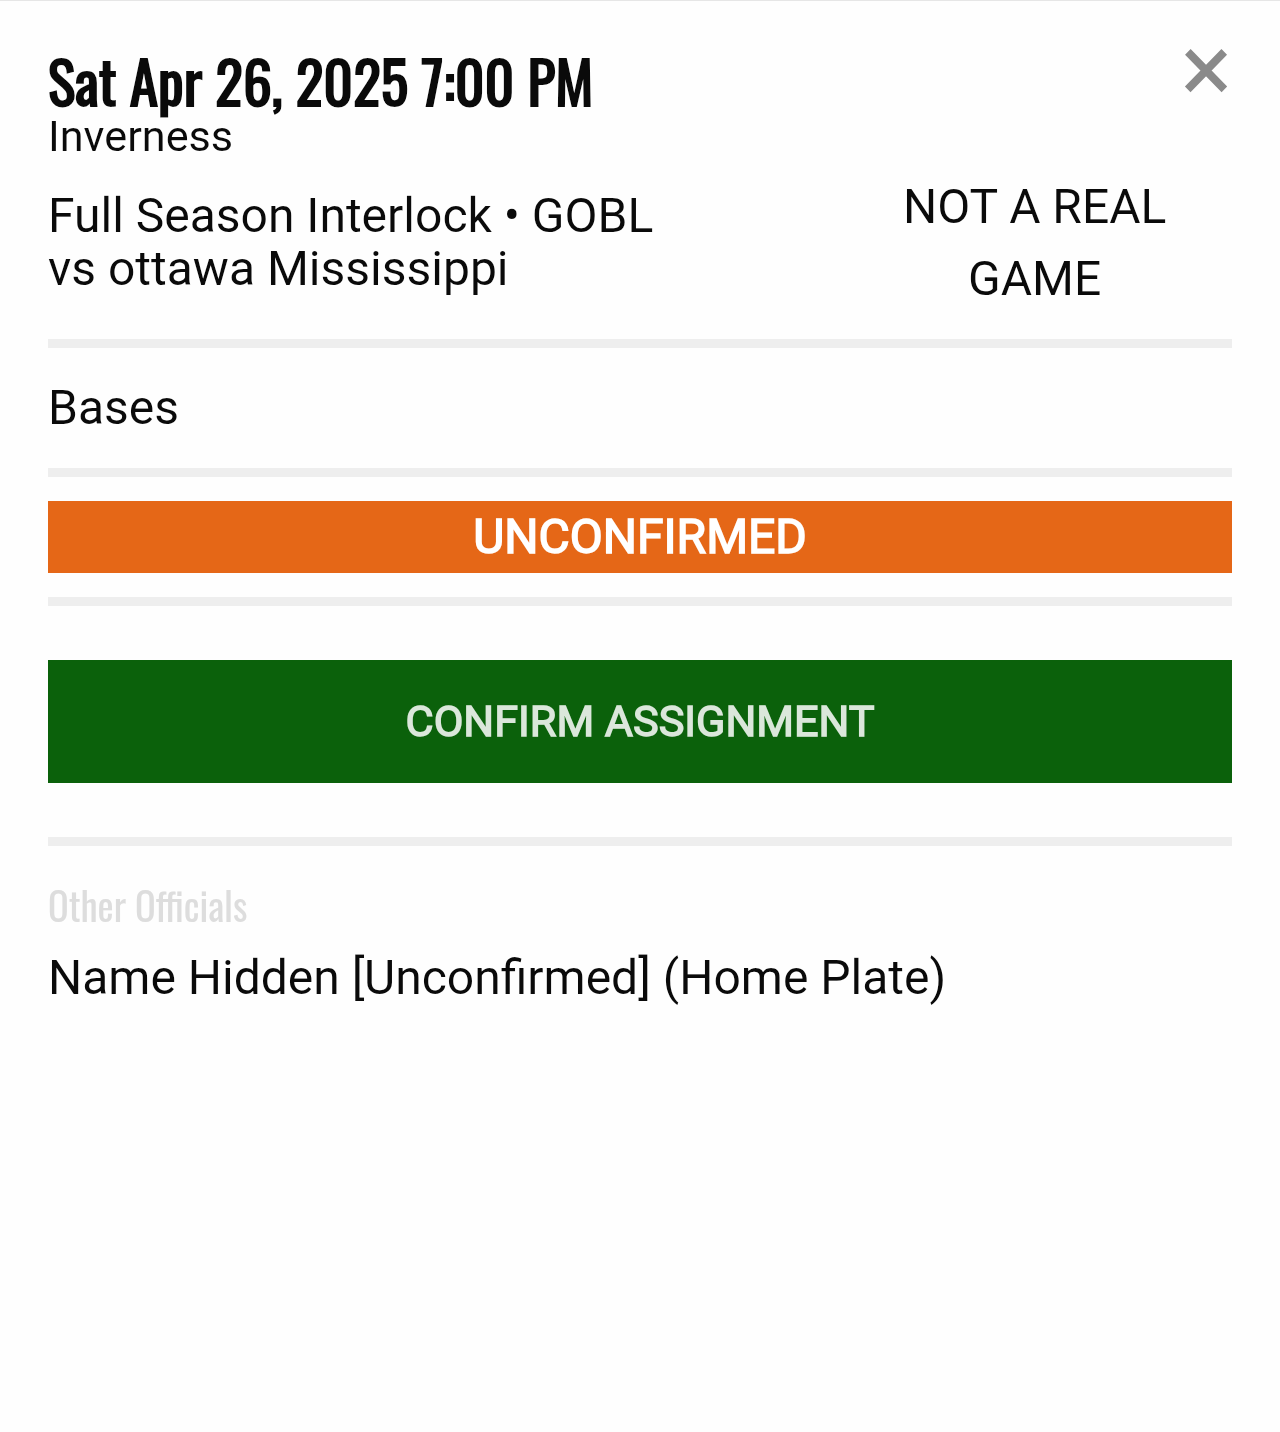
Your assignments status page will then show that you have no unconfirmed assignments.